2026-01-18
create, license, pool, game, process
The following explains how to create and configure games, as well as add accounts to license pools, allowing clients to automatically log in to games using center-provided accounts and also Allow auto check game process
In order to start creating a license pool you can follow this guide .
- Launchers support in license pool
Steam
EA
Battle.net
Epic games
Uplay
Riot games
Rockstar game
VK play
Discord - Normal game type
Windows Apps = Microsoft game (Minecraft, Roblox etc) (Use windows default theme)
- When enabling a game, it's important to select the correct game.exe path to ensure the licensing pool functions properly.
- If the executable file is not specified and the "Run exe" field is left empty, the system will not monitor the main game process. In such cases, the license pool will only be released when the main launcher is closed, not the actual game.
- Additionally, within the game settings, you can choose whether to enable or disable automatic game process checking. If disabled, the system won't verify the game executable, allowing any .exe file to run.
- However, if enabled, the game executable must match the selected file to ensure proper detection and license management.(Figure 1)
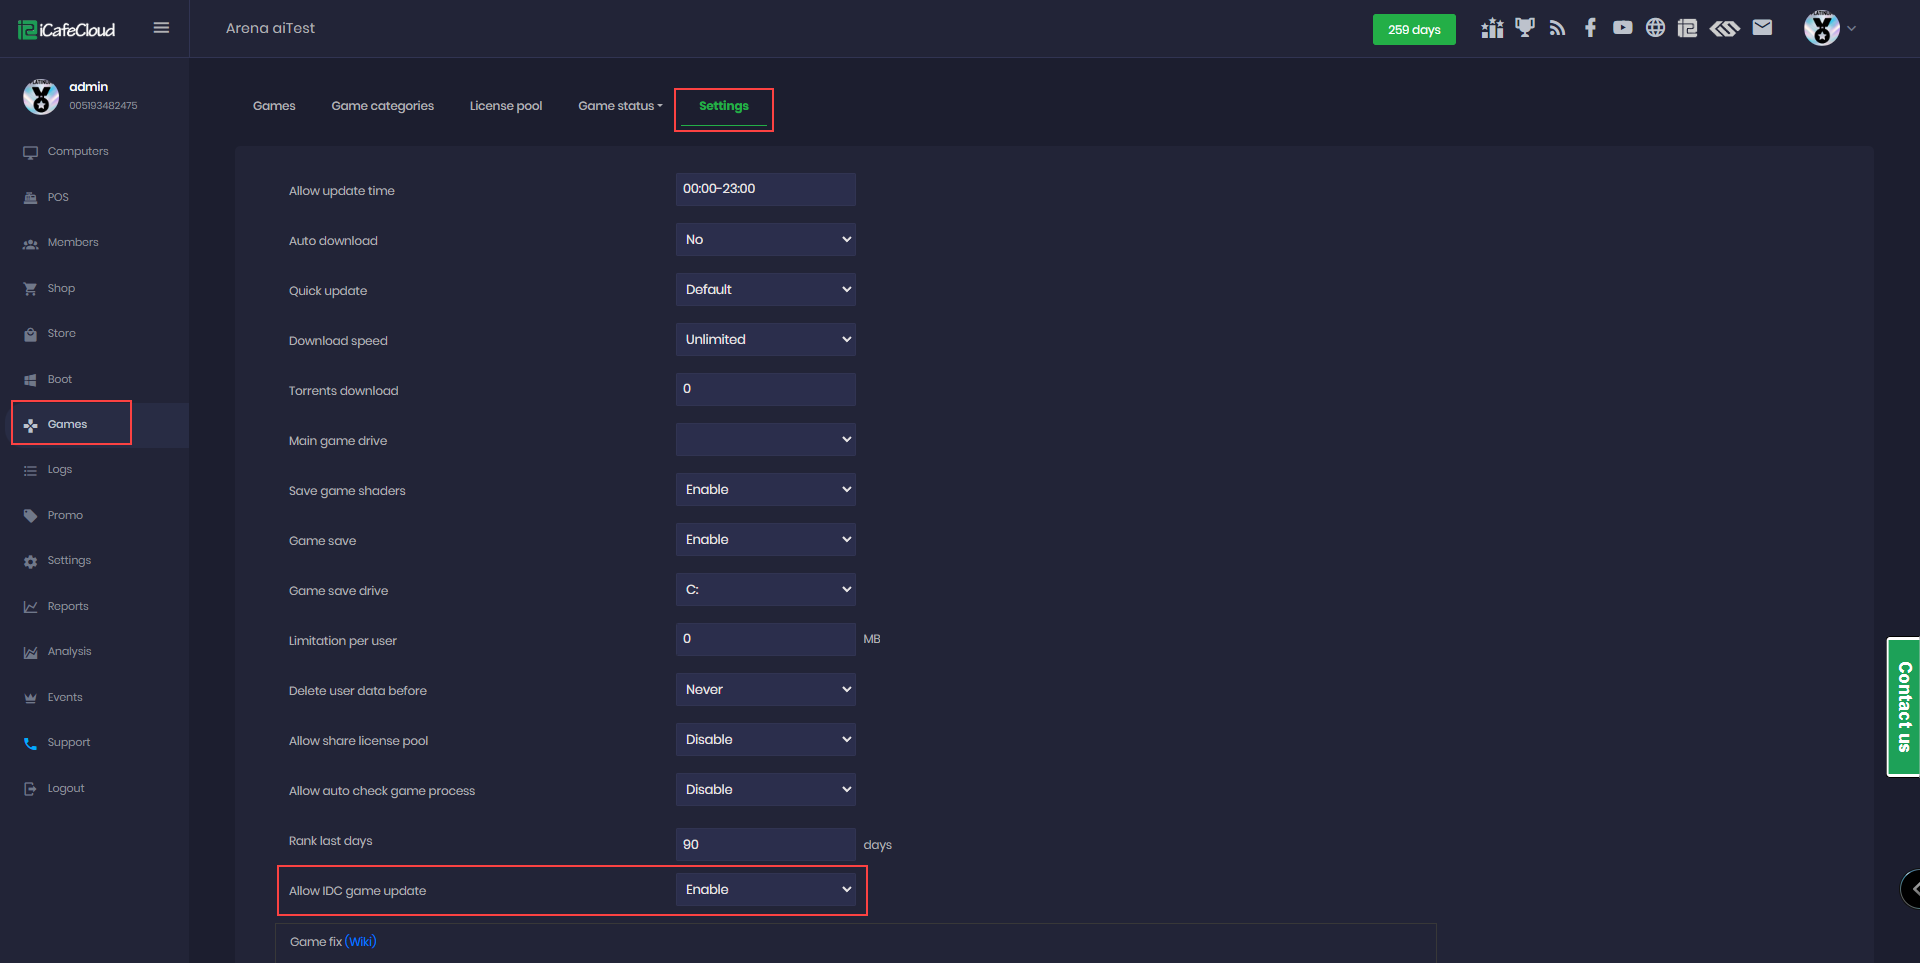
Figure 1
- Navigate to the Game page and click on License Pool to manage the game account. (Figure 2)
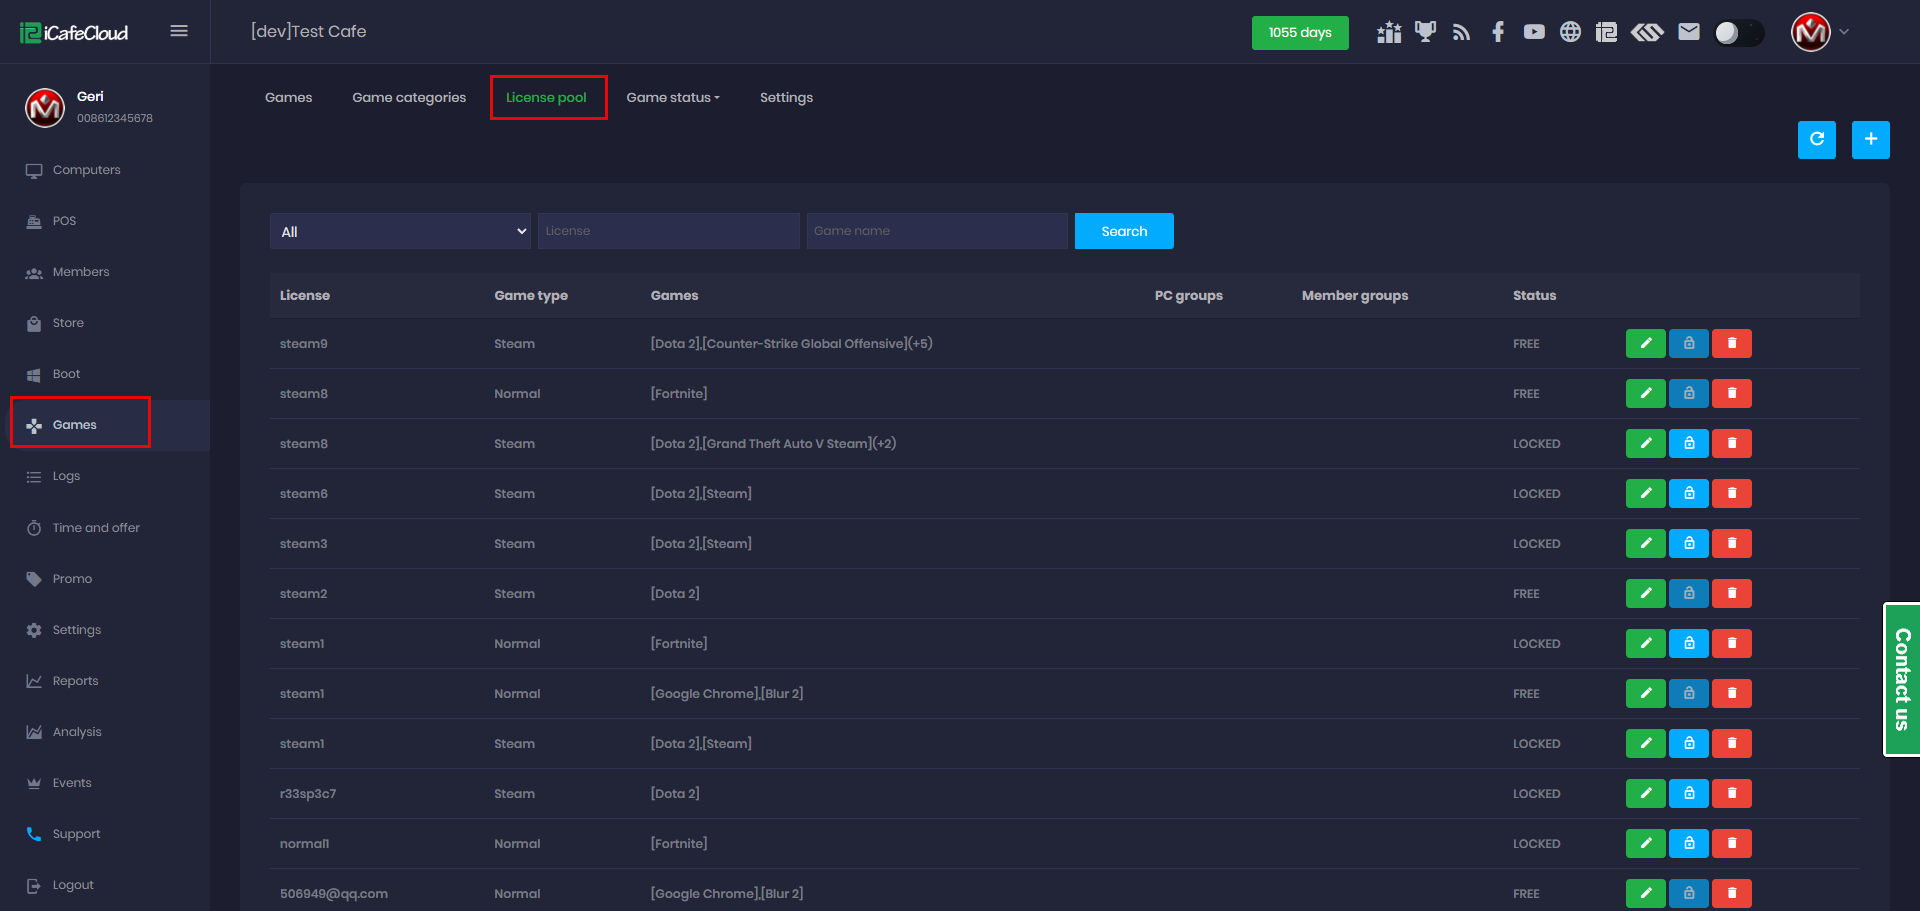
Figure 2
- To add a new License click the add “+” button (Figure 3).
Figure 3
- Select the appropriate Game Type, then enter the required license login and password credentials.
You can click Show Password to verify that the password was entered correctly. (Figure 4)

Figure 4
- If you select a launcher like Steam for the pool, make sure to set the Game Type to "Steam" in the game configuration as well, since only one account type is supported per game type. (Figure 5)

Figure 5
- Select the game from the list of available games according to the selected Game Type.(Figure 6)
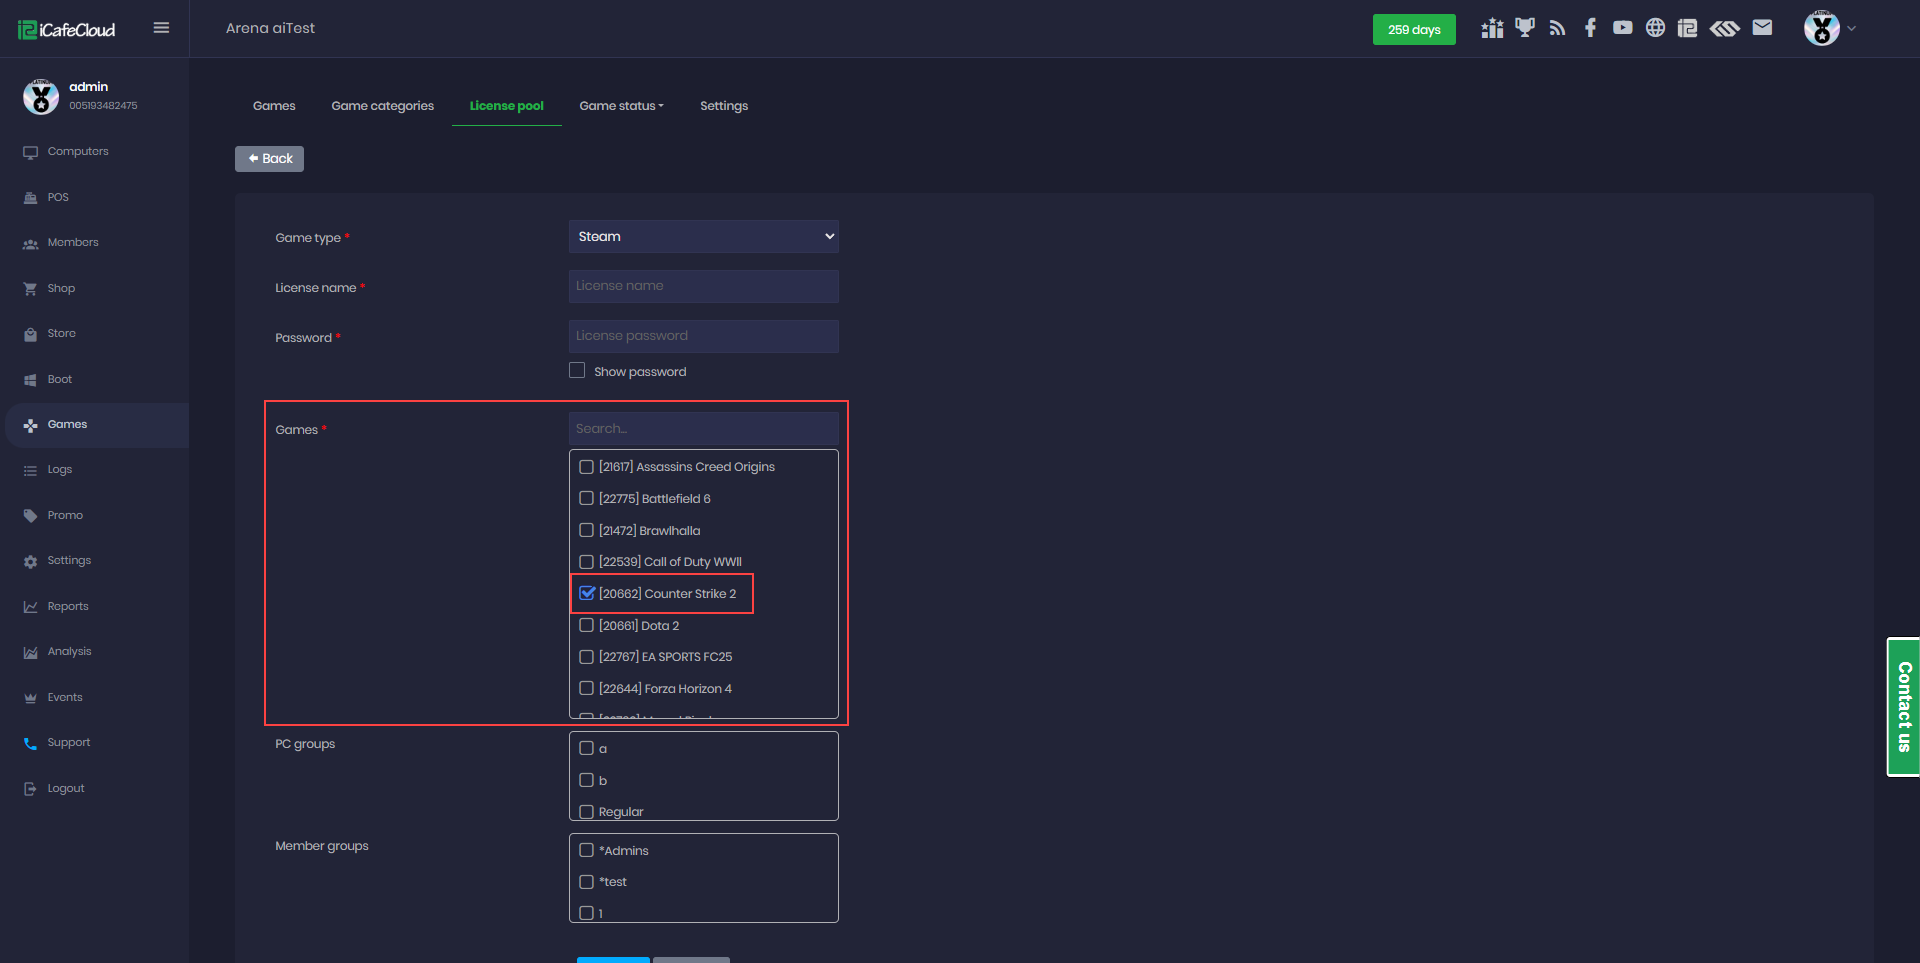
Figure 6
- Finally, choose the PC Groups and Member Groups
if you want the pool to be available only for specific groups.
If you want it to be available for all, leave the group selections empty.
By default, no selection means all groups can access it.
Once done, click the "Add" button.(Figure 7).
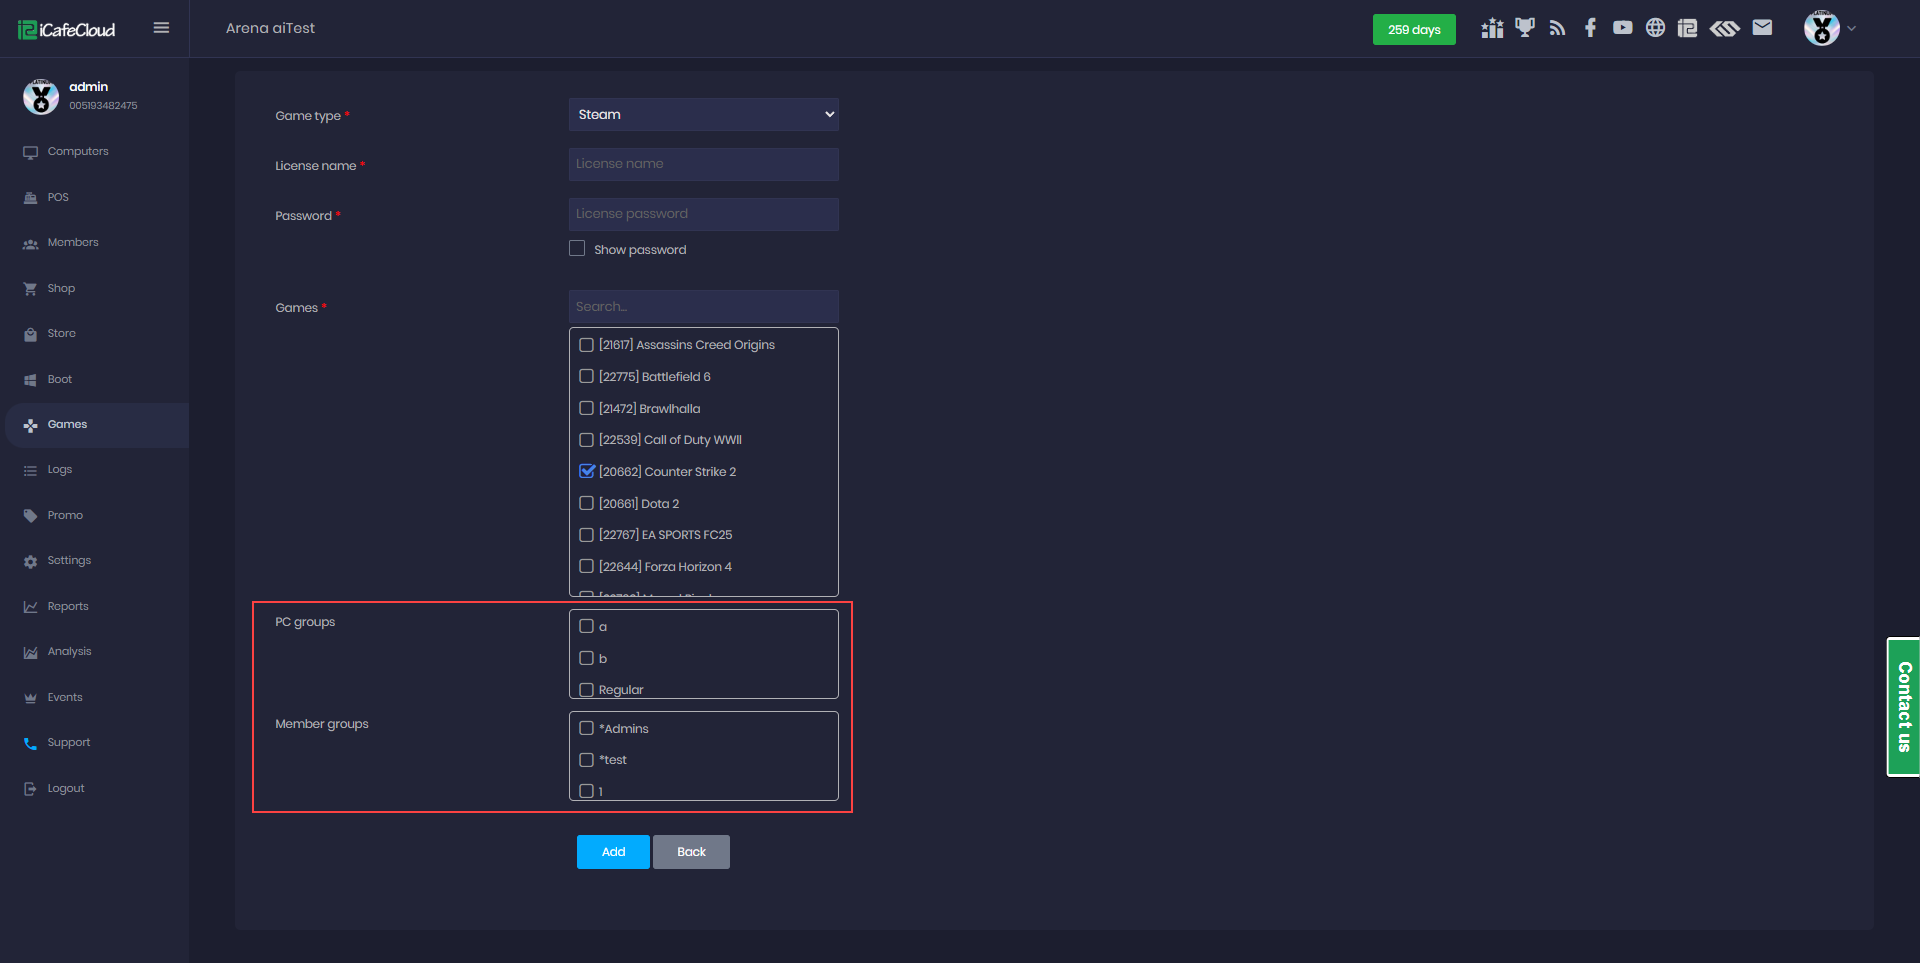
Figure 7
- To restrict access to specific PC groups, check the desired PC groups and click Add.
- To restrict access based on Member groups, check the relevant Member groups and click Add.
- When restricted, only PCs from the selected PC groups and selected Member groups will have access to the license pool.