2025-03-22
session, member, time, prepaid
The following explains what a prepaid session is ,starting a session by paying the full amount upfront. It also covers how to start a prepaid session, how to configure the related settings, and how it functions.
- Prepaid sessions can be enabled or disabled from Enable prepaid settings
- Prepaid sessions mean the user will pay an amount of money in advance to use the computers for a certain period.
- Properly restarting the PC or performing a proper shutdown will automatically check out the session.
- If you are using CCBootCloudX, rebooting the PC from the boot page or cutting the power supply will not check out the prepaid or member session, the session will continue once the PC is booted.
- Go to the “Computers” page, right click on a client PC or more where the user will sit, then choose “Start prepaid session” (Figure 1).
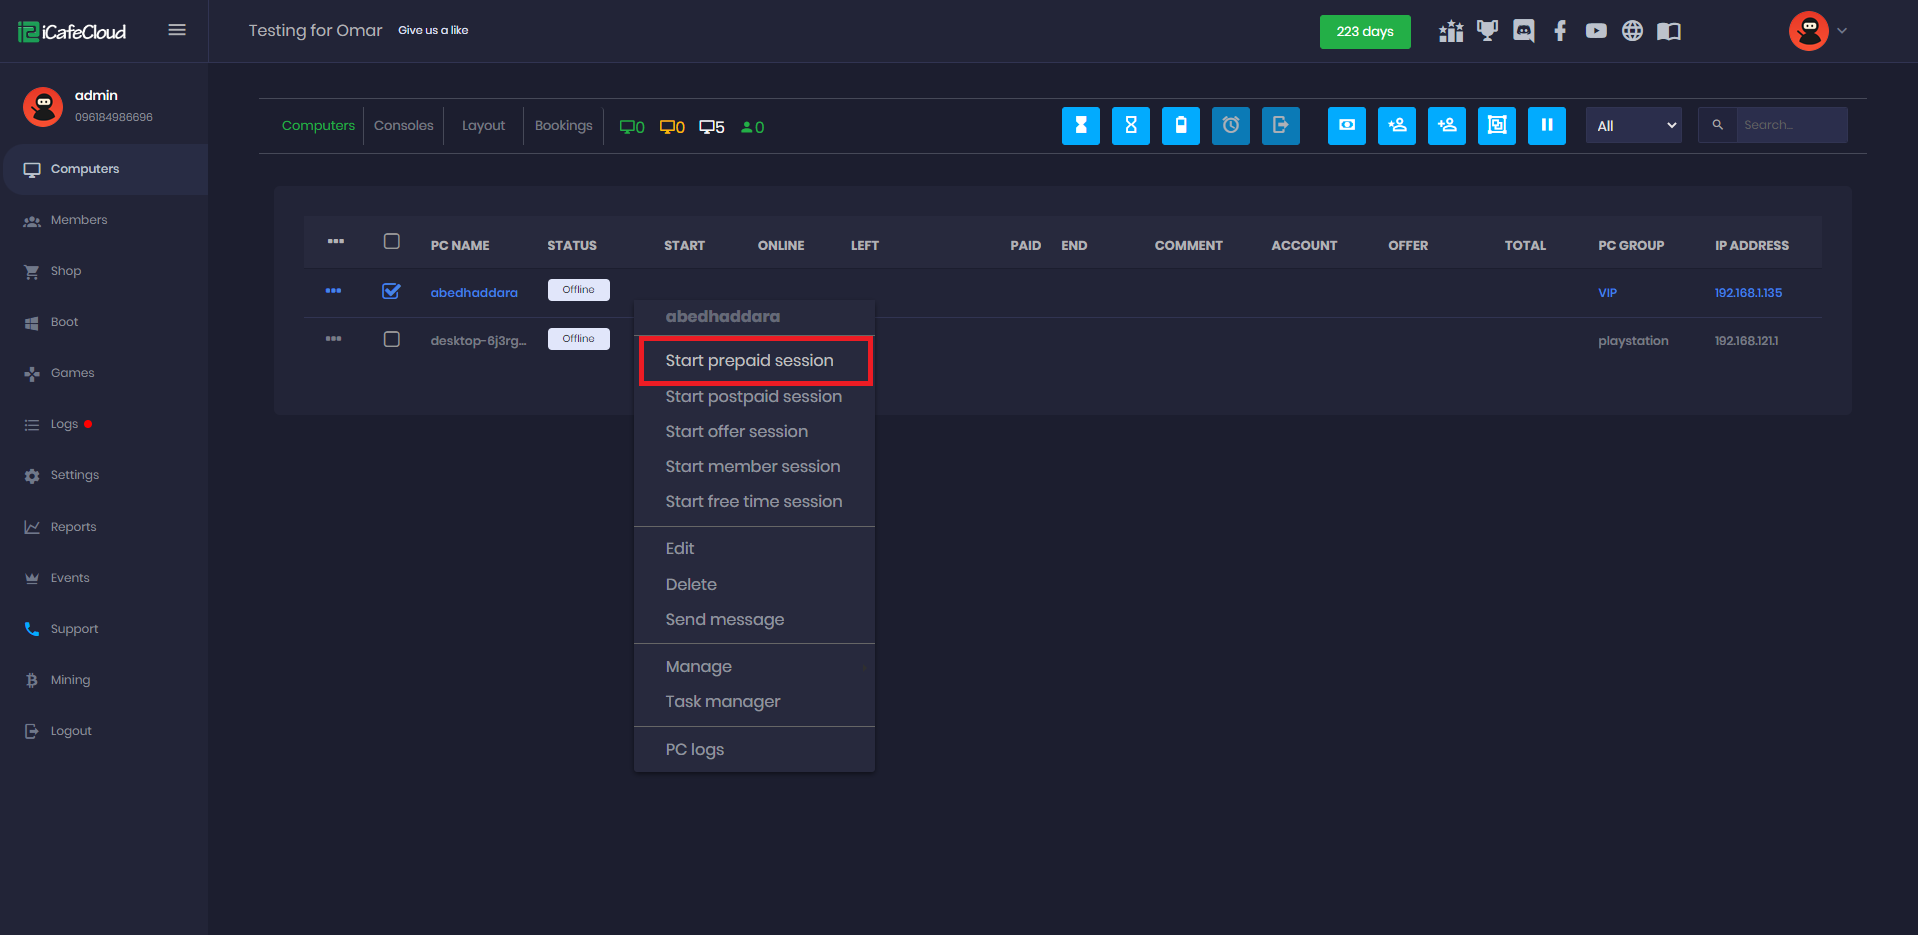
Figure 1
- Either you can enter the custom time or money or click the button available (Figure 2).
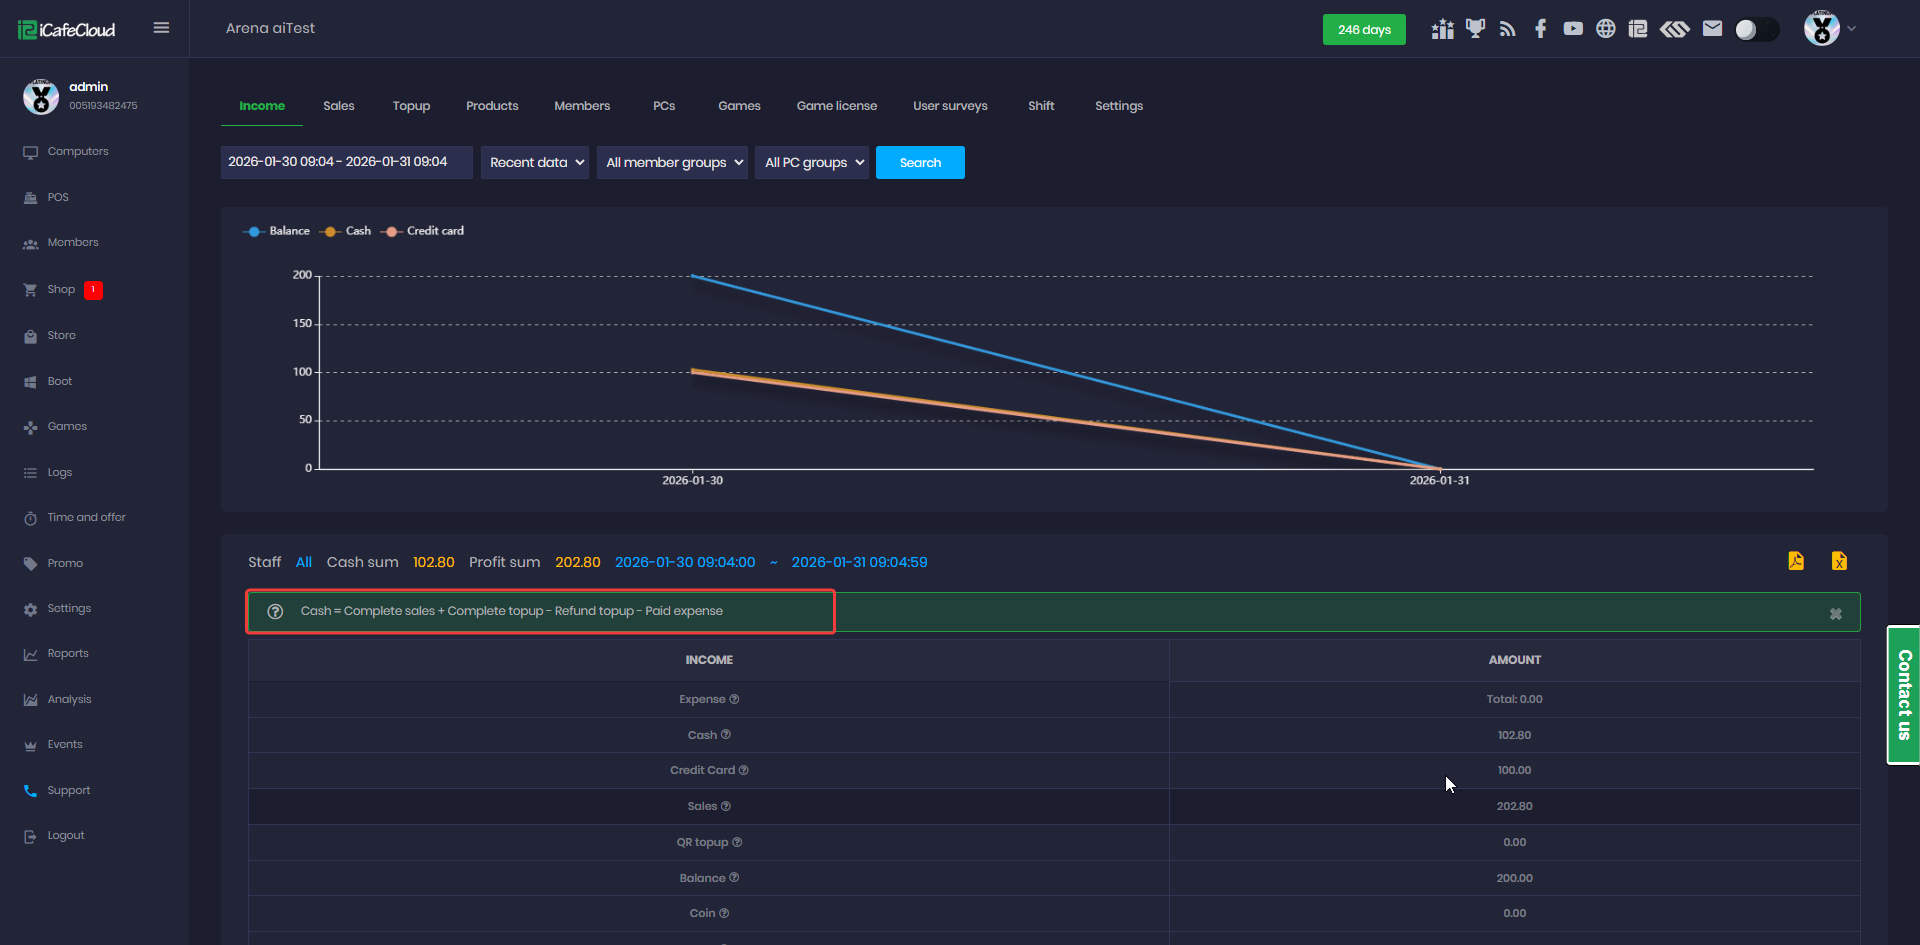
Figure 2
- The Sum will appear here if more than one PC is selected, so enter the “Paid” amount and click the “Start” button (Figure 3).
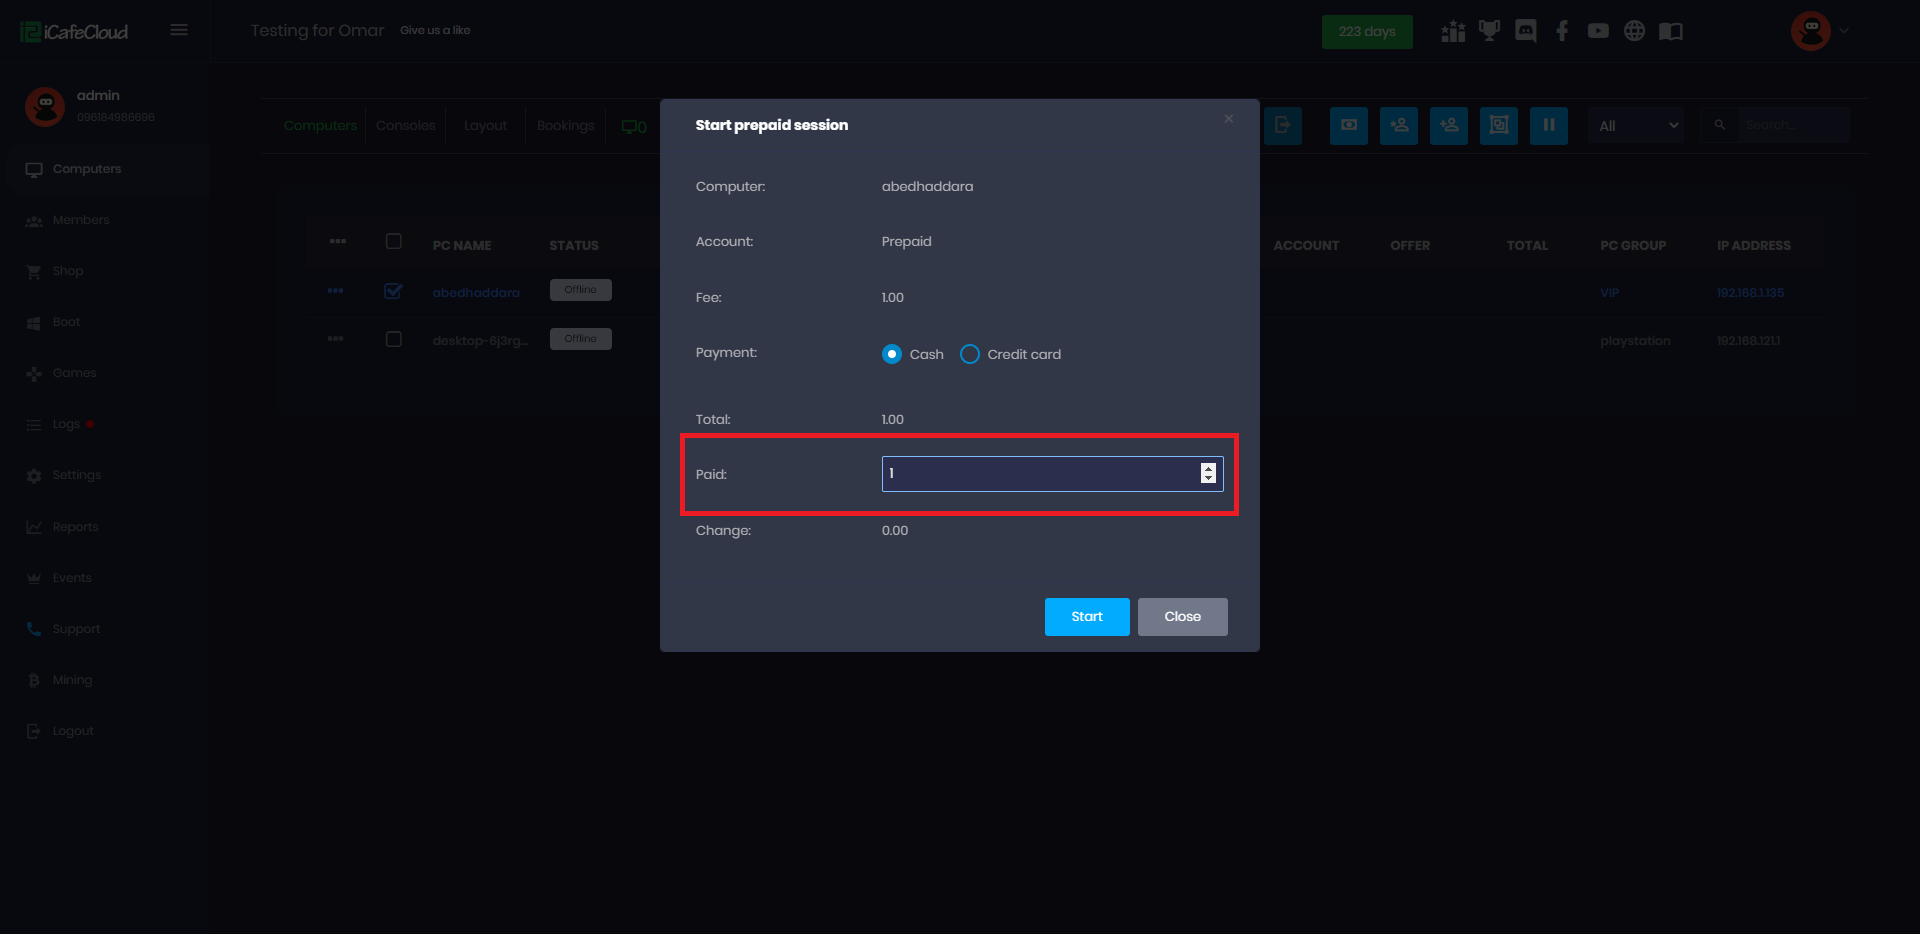
Figure 3
- Once the session starts, the system will display the guest account and password if Access Code login is disabled. If it is enabled, only the access code will be shown, which can be printed if needed. (Figure 4)

Figure 4
- To print a recently checked-out prepaid order or review its details, navigate to the Shop and go to Transaction History. Click on the last order, and the Order Info tab will open, displaying details such as start time, end time, total hours used and more. (Figure 5).
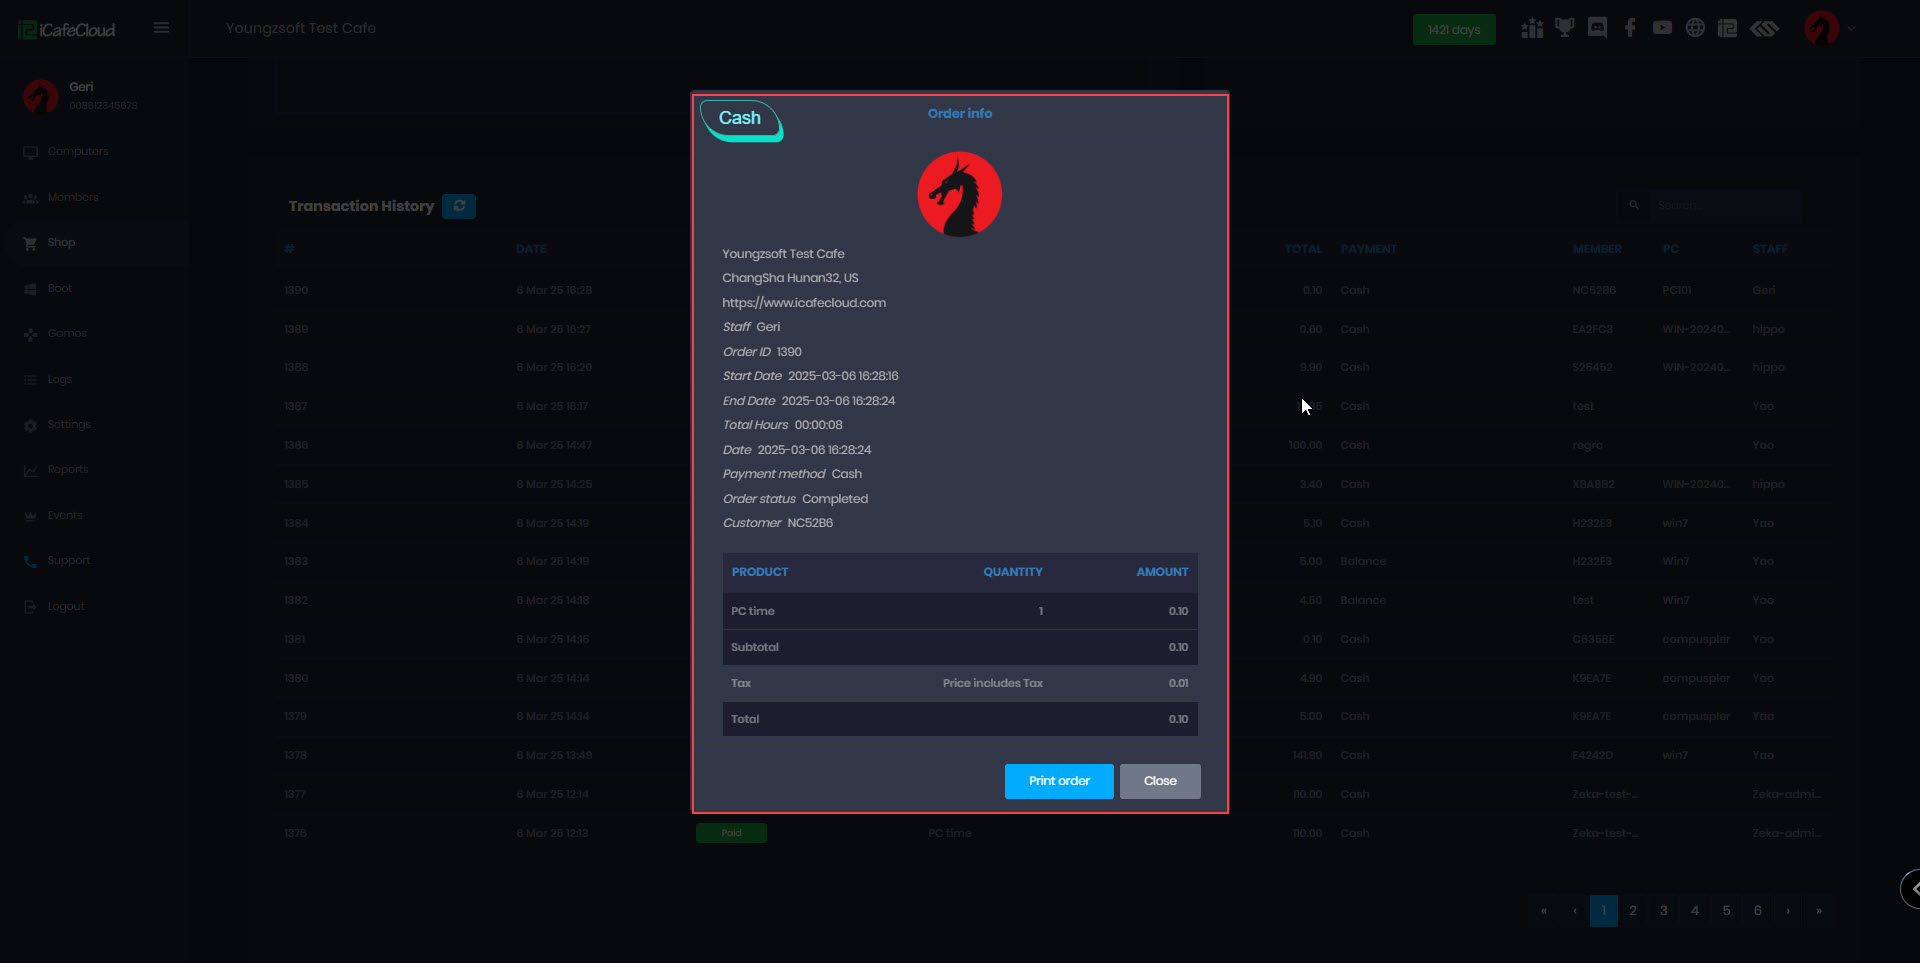
Figure 5
- Then the session will start, and once the time elapses, the session will finish, and iCafeMenu will lock the PC and show it as “Standby” instead of “Online” in the “Computers” page.
- By default, prepaid sessions do not allow users to check out, but you can enable this option in the checkout button which will then appear in the client menu. (Figure 6)
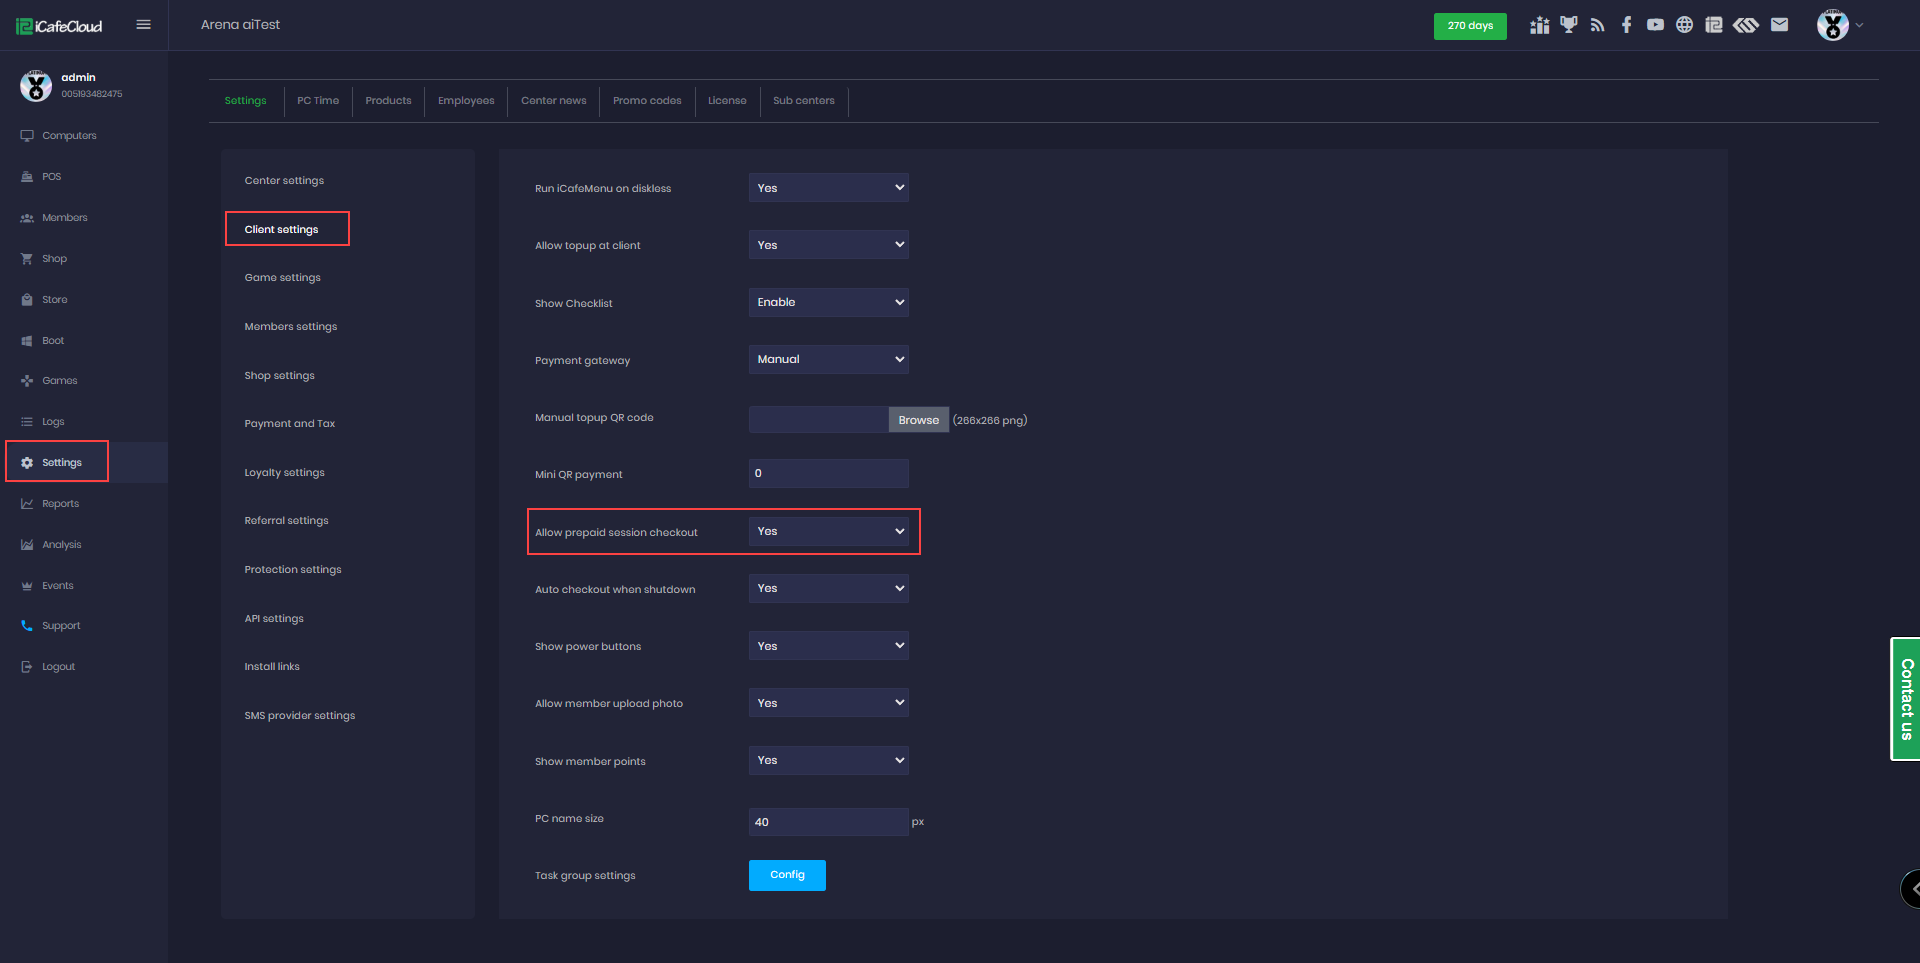
Figure 6
- If the prepaid session time has not ended yet, you can log in again using the guest username and password.
- For prepaid sessions there is no Cancel Order button, only options to Print Order and Close it. (Figure 7).
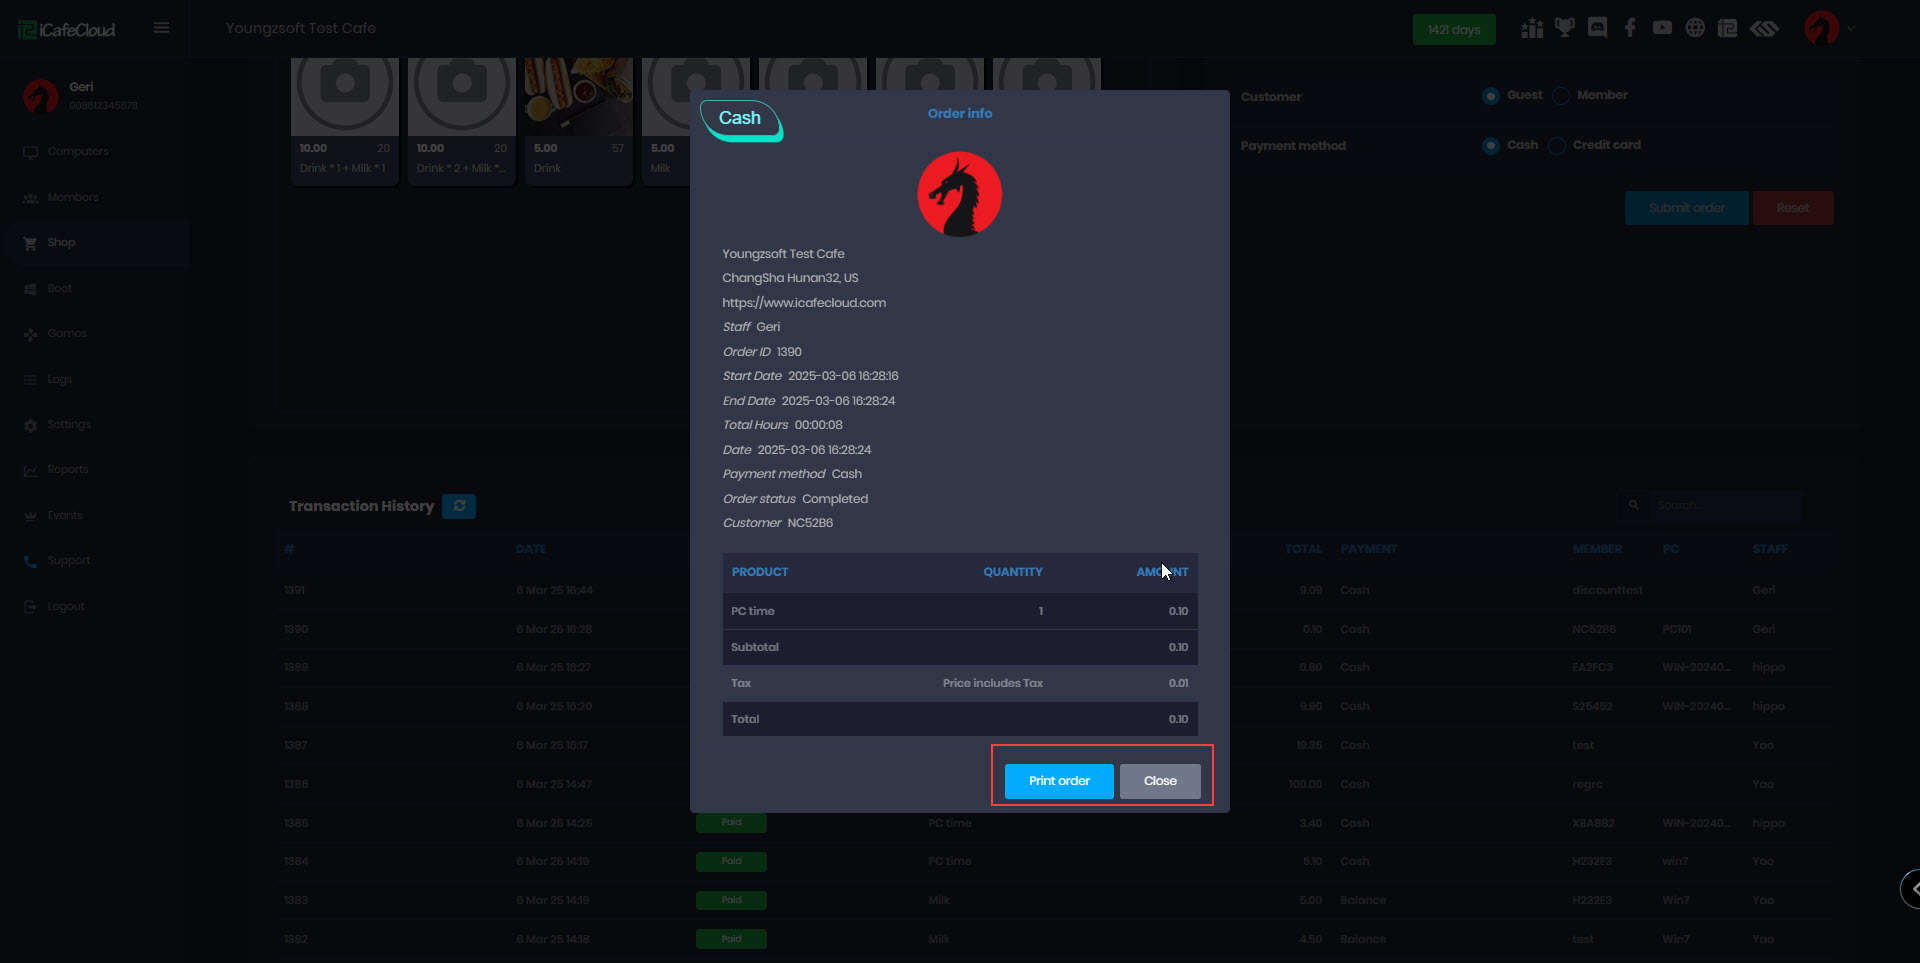
Figure 7
- If many postpaid PCs are selected for checkout, the total payment will be auto-generated.
- If you start a prepaid session by entering an erroneous amount, you can refund it by following the Refund Balance guide.
- When a Prepaid session is active and an add session is added from another PC, the system will no longer auto-checkout. Instead, when the time runs out, a message will be displayed on the client side.
- We recommend disabling “Allow prepaid session checkout” from client settings if you use add session function.
- If the "Allow Prepaid Session Checkout" setting is enabled, it will not apply to Prepaid sessions with add sessions. Instead, a notification message will be shown. (Figure 8)
Figure 8