Wiki Home Computers page Booking a PC
Booking a PC
2023-04-10
pc, computer, booking, console
The following allows cashiers to reserve PCs and devices for members, ensuring exclusive use during the booking period. Settings allow bookings on online or offline PCs, with bookings created via the iCafeCloud web interface.
- You can enable or disable bookings in the settings by setting 'Allow Booking' to 'Yes' or 'No' based on your preferred workflow.(Figure 1)
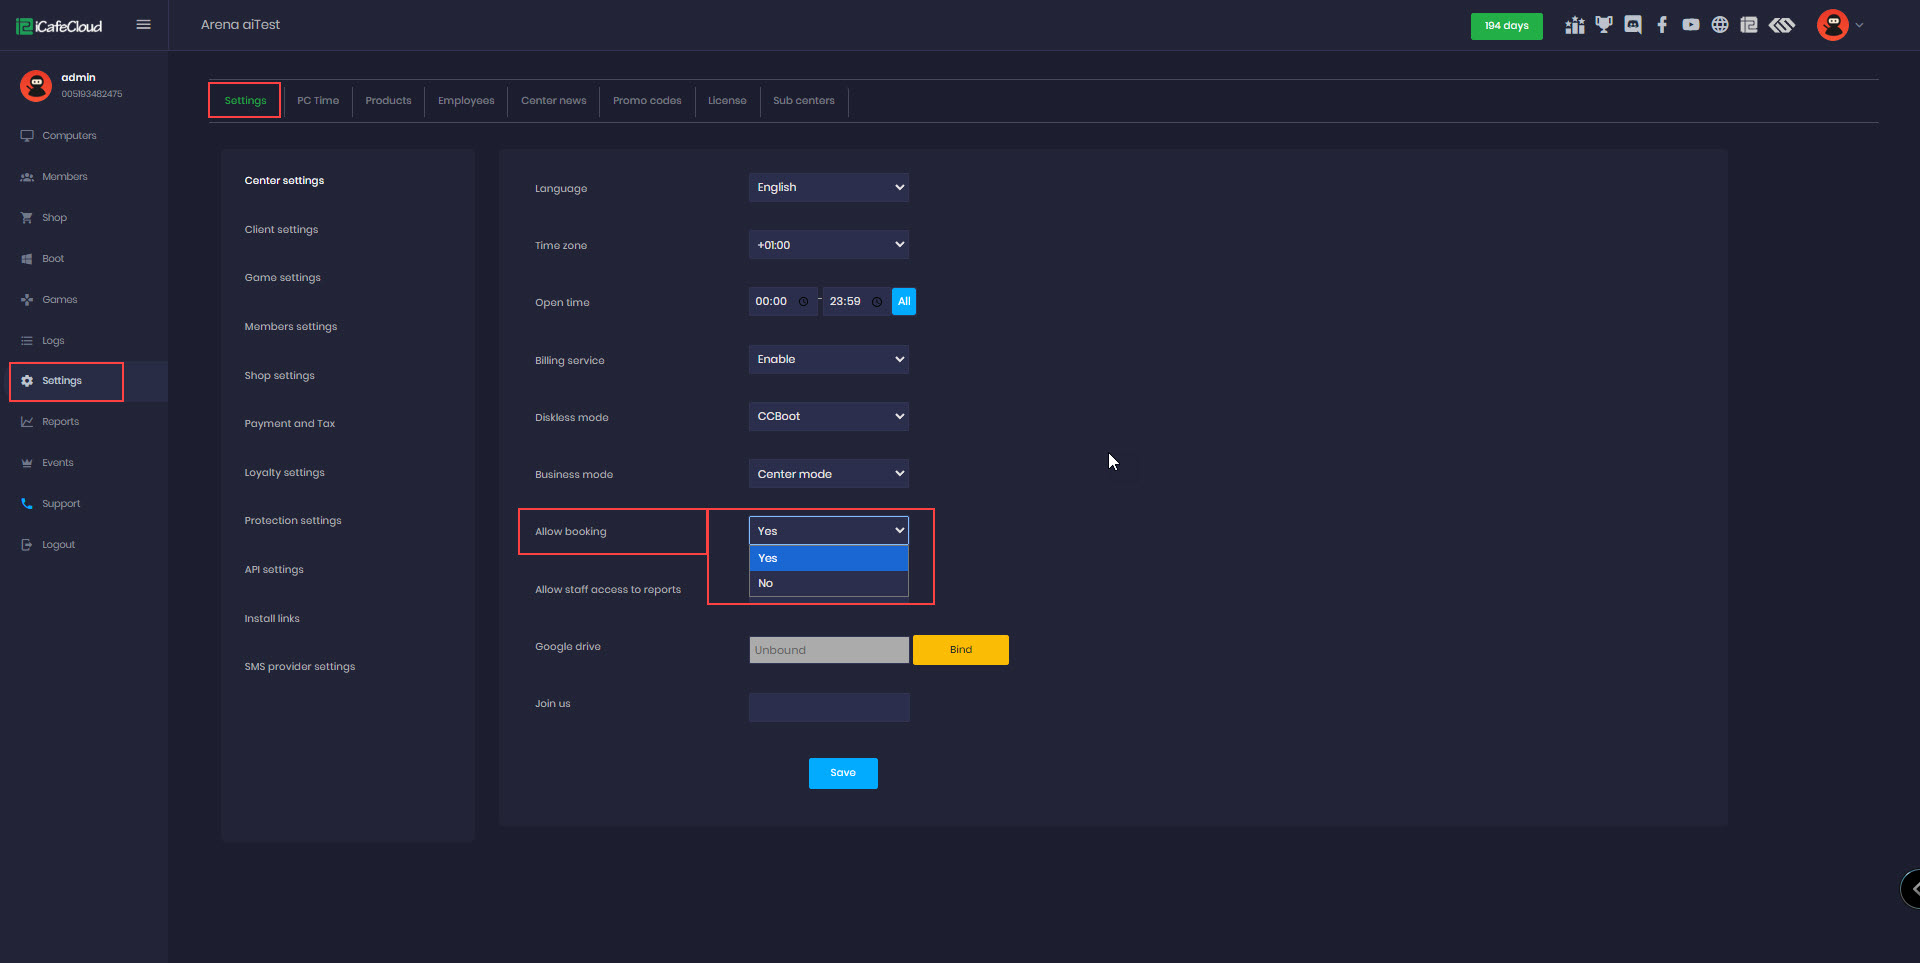
Figure 1
- This function lets cashiers reserve PCs and devices for members. Only the member who reserved them can use them during that time.
- After using the booking balance it will auto switch to the highest priority offer if customer use offers
- If a PC is booked days in advance, you can still use all sessions available.
- Once the booking time starts, measured in minutes deducted from the member's account balance, no one else can use the reserved PC, and no sessions can start until the booked time has passed.
Example: If a session is booked for 30 minutes and the time hasn't yet passed the 30-minute mark, only the member who booked it can log in. Once 30 minutes have elapsed, at 31 minutes and beyond, all sessions can be accessed. - If a postpaid session is active when a booking is made, the booking will not terminate the ongoing session.
- Admin account can cancel booking , if booking is canceled it will refund the amount fully.
- Start time must not be past and must be future. (Check Settings - timezone to be always correct)
- Disabling the "Allow booking when PCs are online" function means that only offline PCs can be used for booking, which is the default setting.
- Enabling the 'Allow booking when PCs are online' function allows bookings to be made regardless of whether the PCs are online or offline. To enable this, navigate to Settings - Payment & Tax and toggle the option.(Figure2)
Figure 2
- Go to the Computer page on iCafeCloud Web, then switch to the “bookings” tab.(Figure 3)
Figure 3
- You can choose which group you want to display(Figure 4).

Figure 4
- Hovering the cursor and selecting the plus “ + “ sign will create a booking with the specific time and device, and “+” button will appear.(Figure 5)
Figure 5
- Booking can be canceled.
- If allow booking when the pc is online is enabled Portal members can only book an online pc after 12 hours.
Booking for members
The cashier can book a PC for a member using the following steps.
- Press the “+” button and fill the information about your booking,
- Member: Start typing the member’s name, and suggestions will automatically appear based on the entered letters.
- Guest: Selecting "Guest" will disable the member input and initiate a guest booking.
- Start Time: Choose the time when the booking should begin.
- End Time: Choose the time when the booking should end.
- Comment: Optionally, enter a comment related to the booking, then press OK (See Figure 6).
Figure 6
- Next, the system will display the cost, member balance, and bonus. To confirm, click the 'OK' button. (Figure 7)
Figure 7
- All bookings will be listed in this illustration, with the X-axis representing time and the Y-axis representing the PC name. (Figure 8)
Figure 8
- Once you booked notification that from Booking offer will change to balance mode (Figure 9)

Figure 9
- Booking cannot be initiated if the booking time is outside the center's opening time.
Booking for guests
The cashier can book a PC for a guest using the following steps.
- To indicate someone as a guest, simply check the "Guest" box. This action will automatically remove the option to add a member's name, as the system will recognize the booking as being made by a guest. However, in the comments section, you can manually include the name of the person who made the booking for reference. (Figure 13)
Figure 13
- On the Booking page, the guest's name will be displayed. If you hover over it, the name from the comments will be shown. (Figure 14)
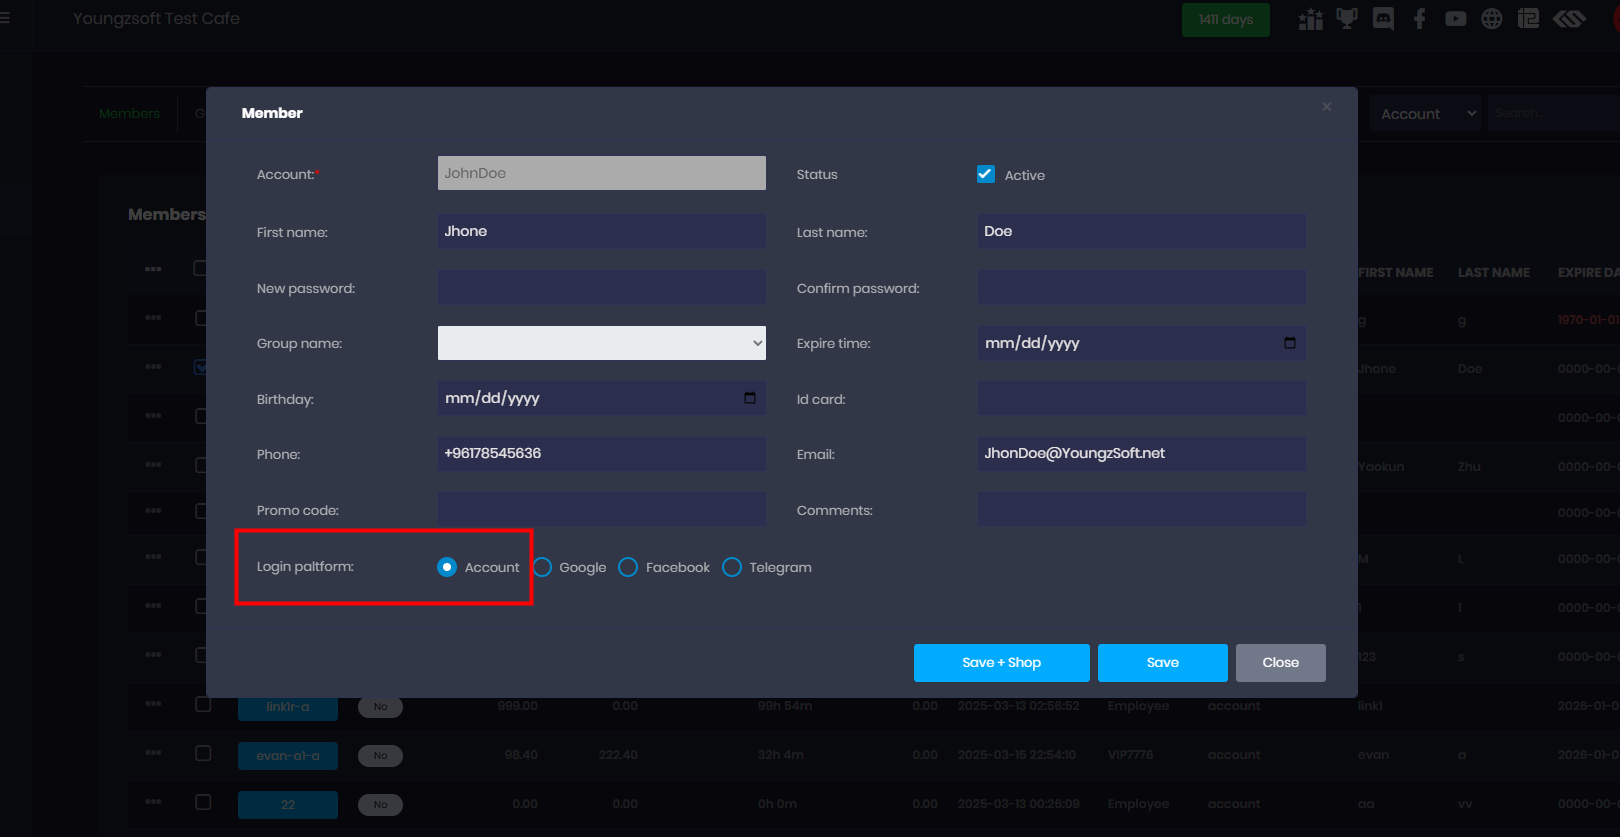
Figure 14
- When the guest arrives you can cancel the booking.
- Now, the guest can utilize the PC that has been reserved for them.
- At the client login, a notification will appear about recent booking when booking is added (Figure 15).
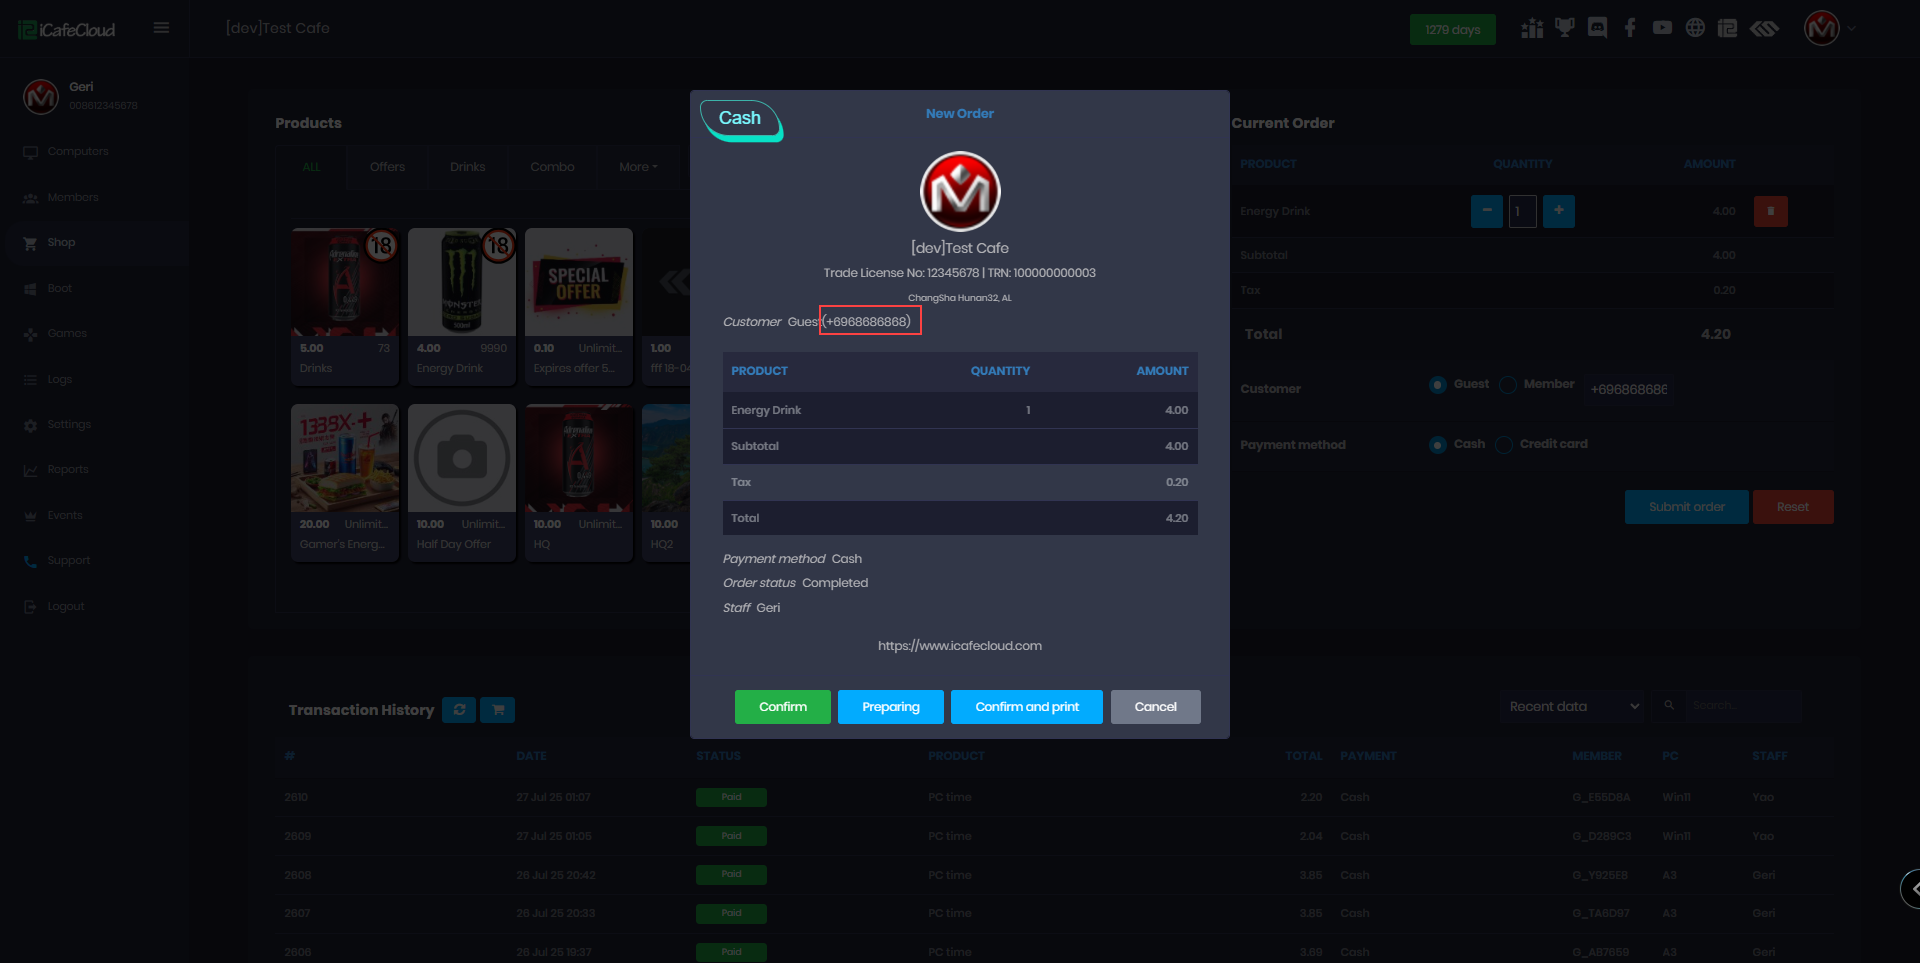
Figure 15
- If there is a member logged on before booking time, booking auto checkout members now when the booking time starts. (and notification will appear before 5 minutes from booking time to notice that the member will be logged out) (Figure 16).
Figure 16