Wiki Home Settings page QR topup with Kaspi
QR topup with Kaspi
2025-03-26
qr, topup, pay, kaspi
The following guide explains how to retrieve your Kaspi account details and connect it to iCafeCloud for QR payments.
- To enable Kaspi integration with iCafeCloud, you must complete a form requested by Kaspi.
- Download the Kapsi Form here fill in all the required details with your own information and send them to the email address provided in the document. Make sure to mention "iCafeCloud" . This is important.
- Once they verify the form, they will enable the integration, and you can proceed with the steps below.
Server side
- Log in to the Kaspi app on your mobile device, then tap the "My Bank" button. (Figure 1)
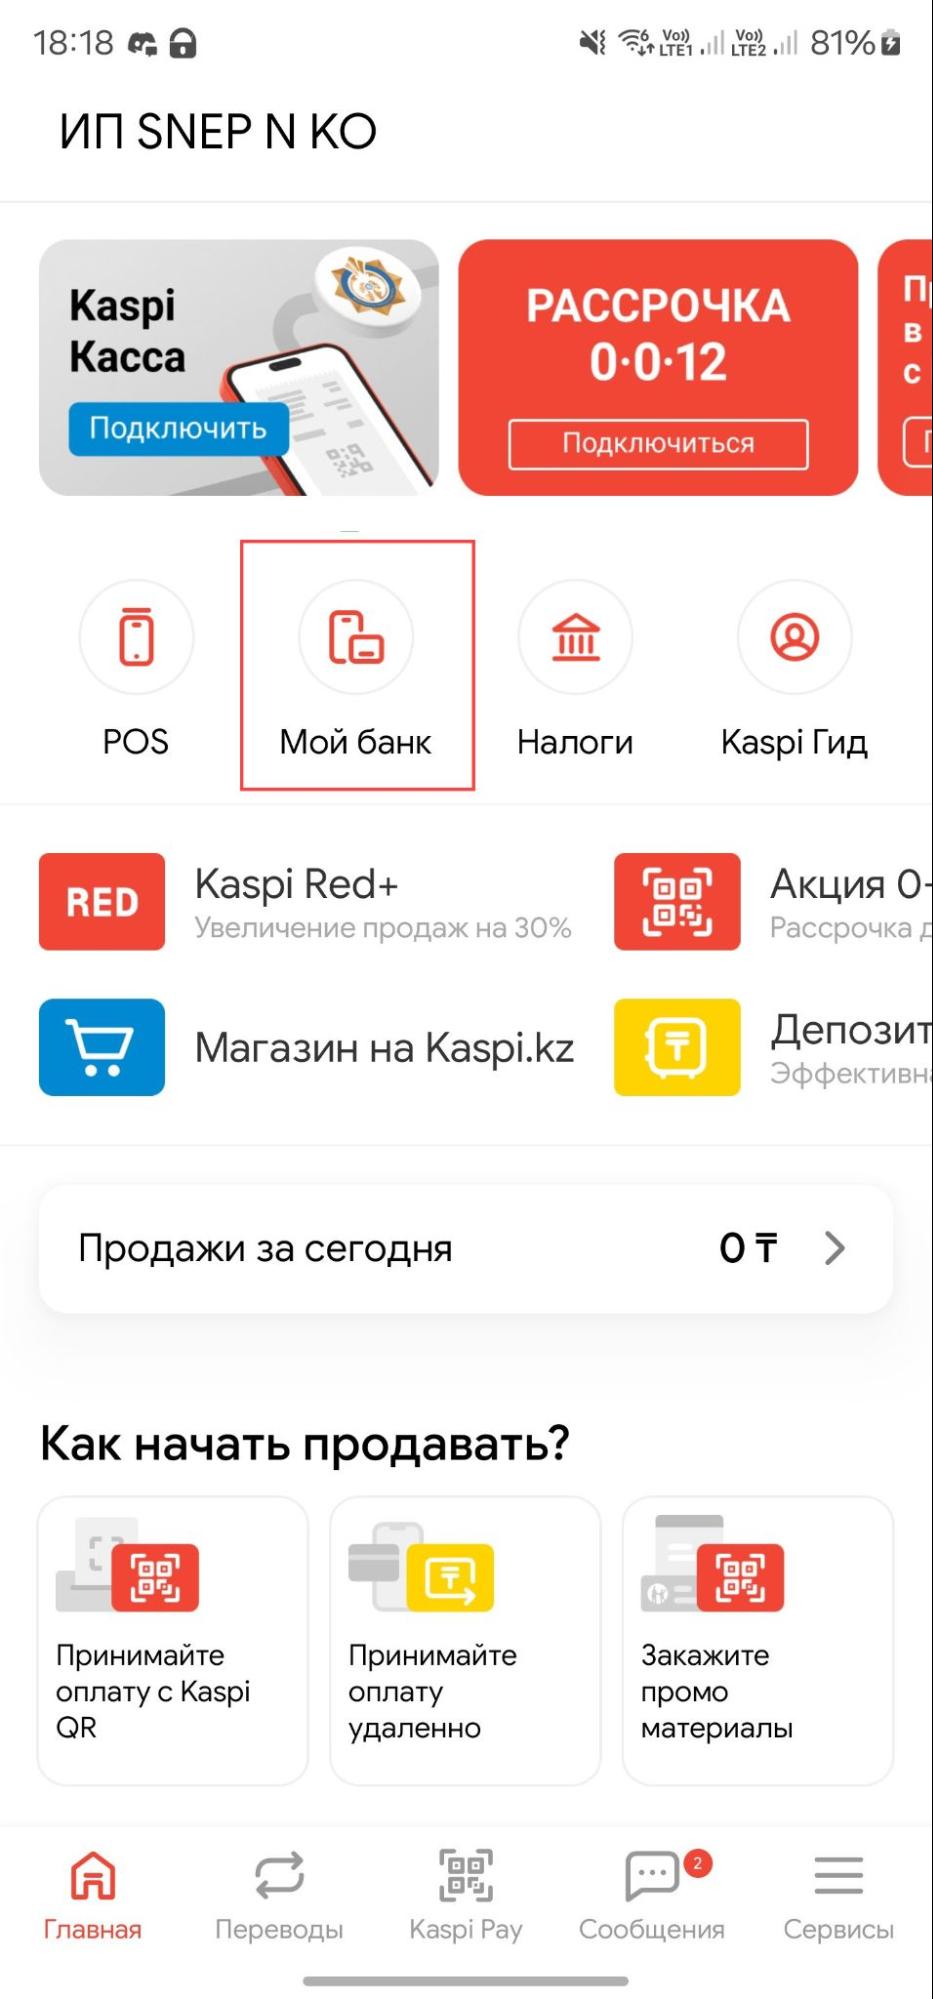
Figure 1
- On the "My Bank" page, select your Kaspi Pay account for use.(Figure 2)

Figure 2
- On the next screen, tap "Info", then select "Account Details". (Figure 3)

Figure 3
- In the "Account Details" section, you will find the BIN number. Save it, as you will need it later for the iCafeCloud settings.(Figure 4)

Figure 4
- Go to the iCafeCloud admin panel and navigate to Settings → Client Settings.
- Find "Allow Top-up at Client" and change it to Enable.
- Under Payment Gateway, select "Kaspi".
- In the next field, enter the BIN number retrieved from your Kaspi account details.(Figure 5)
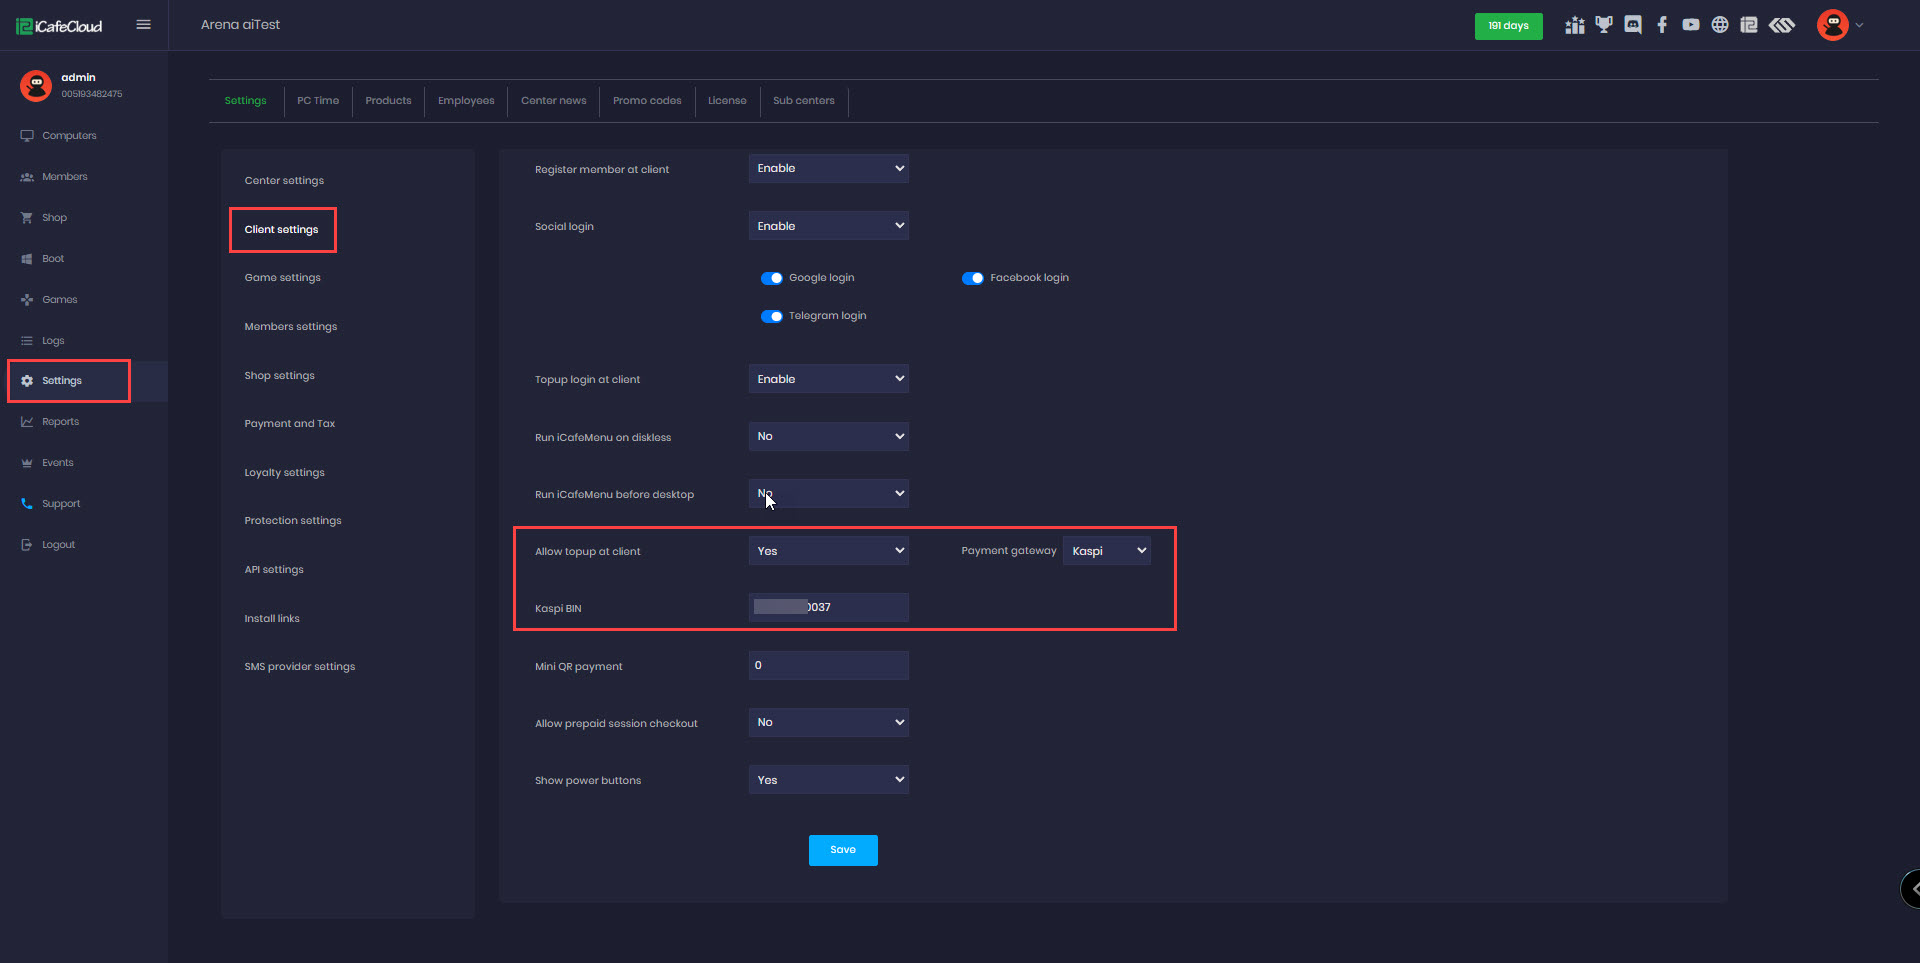
Figure 5
Client side
- On the Client interface, click the Top-up button.(Figure 6)
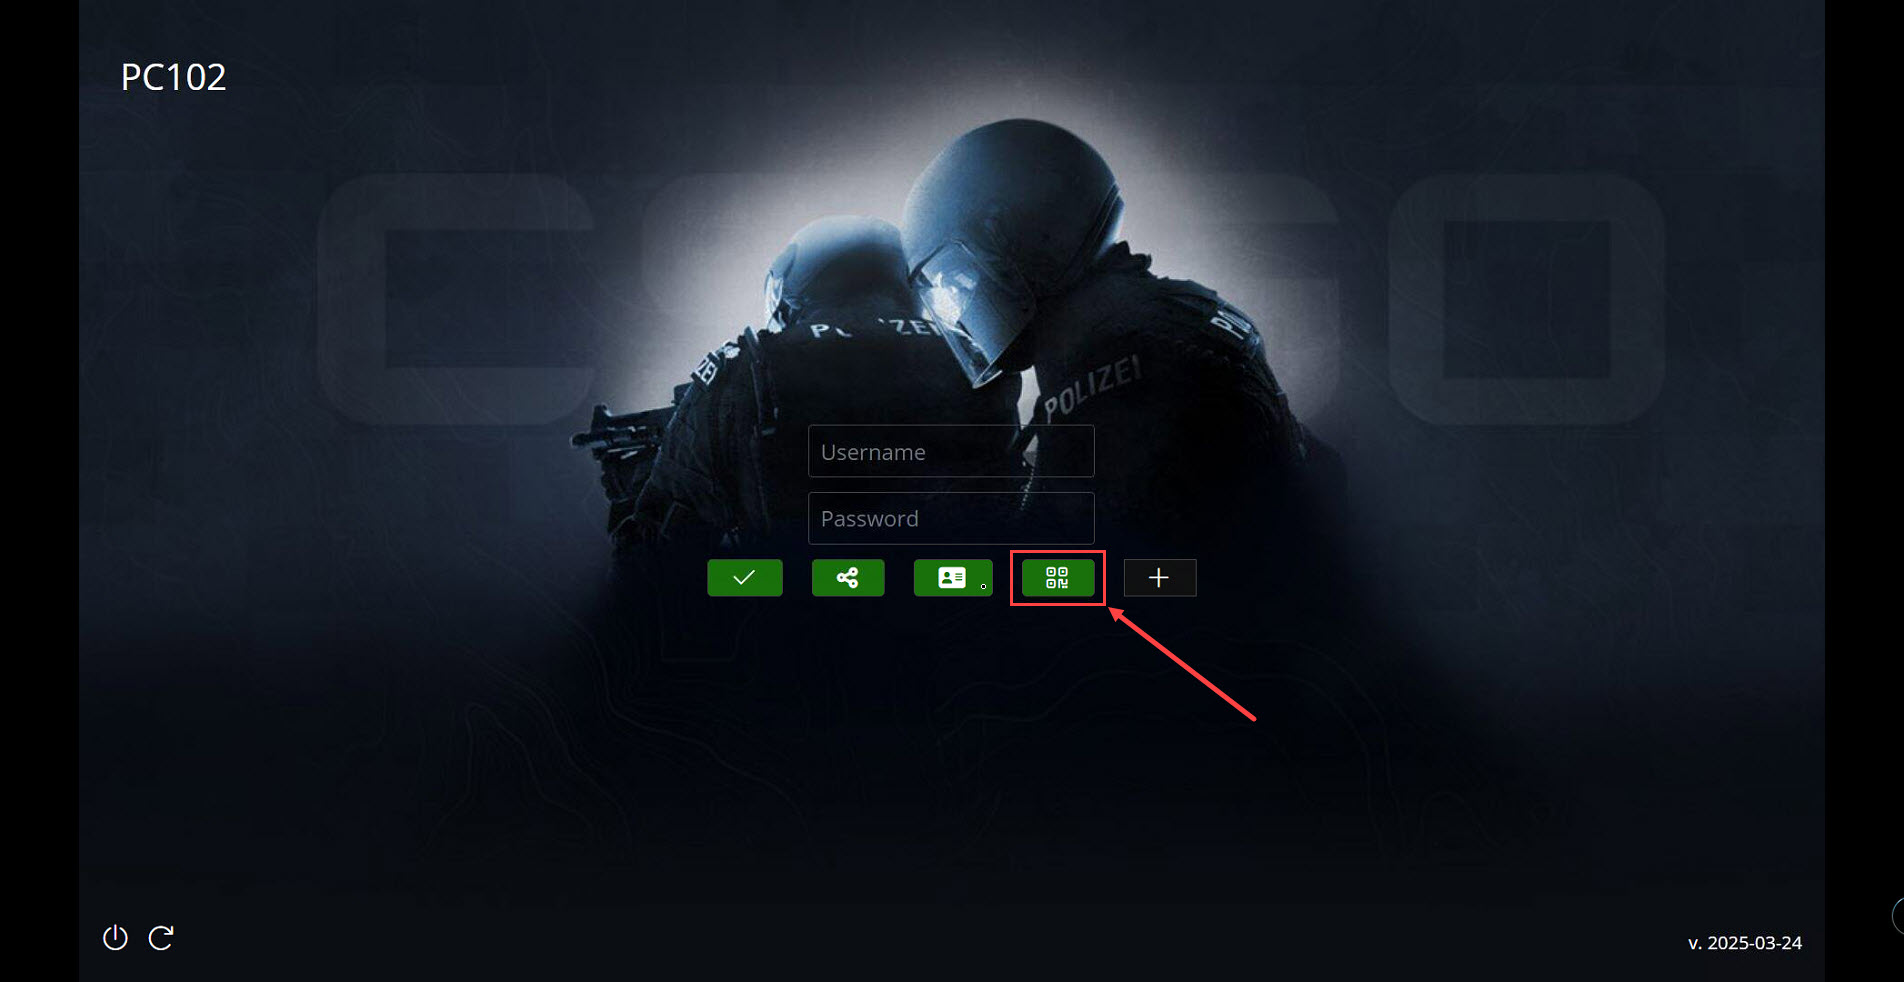
Figure 6
- Enter the amount you want to top up in your local currency, then click Submit. (Figure 7)
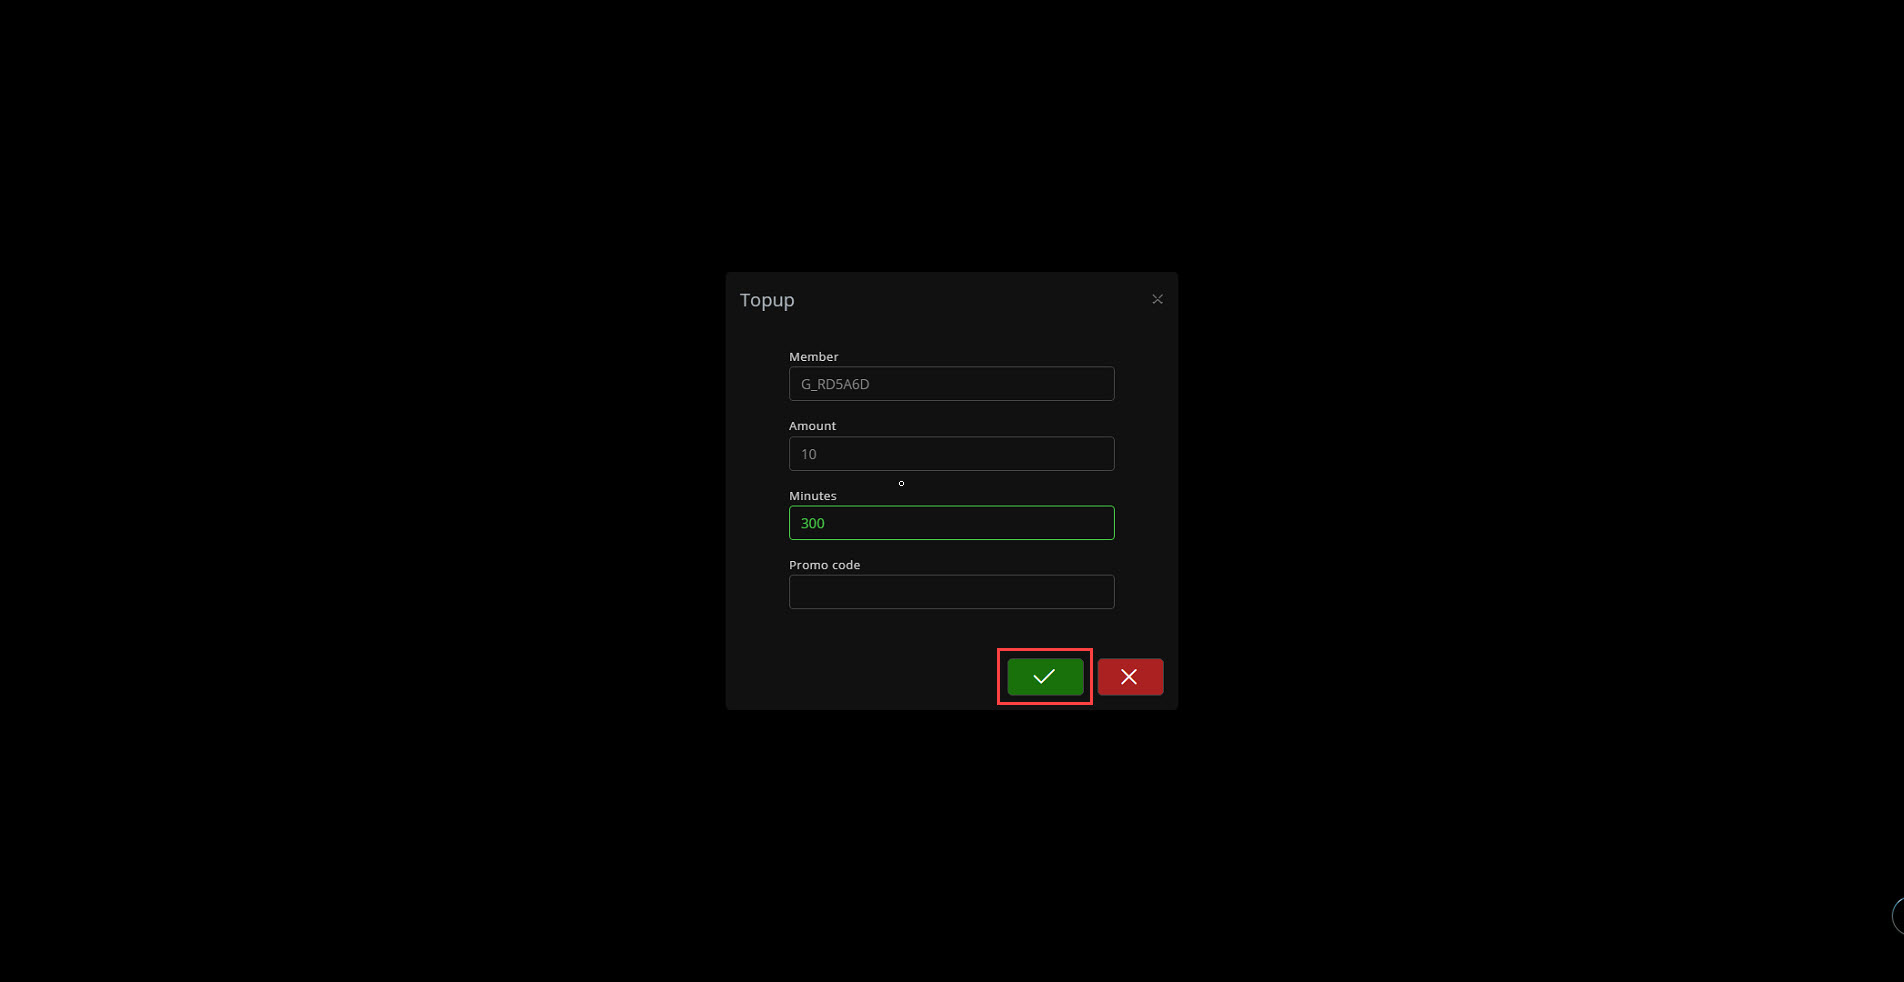
Figure 7
- A QR code will be generated to process the Kaspi payment. Scan it, and you will be redirected to the Kaspi app to complete the payment.(Figure 8)
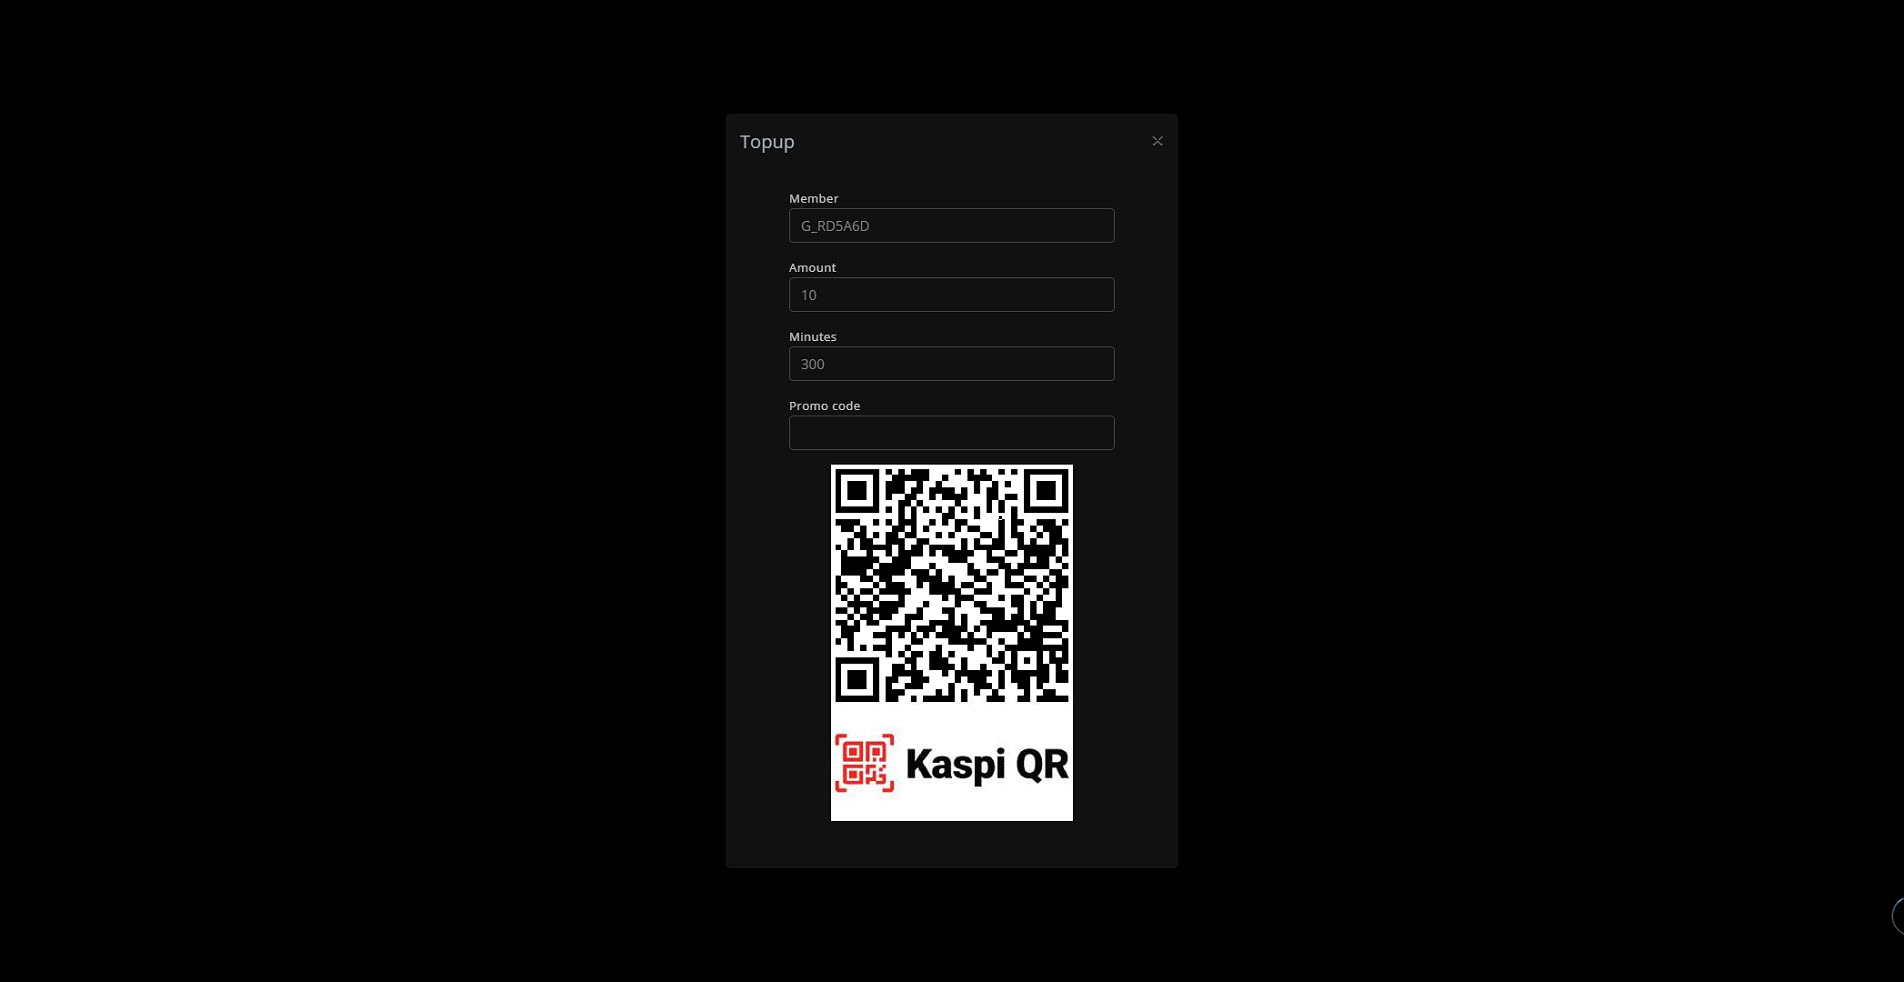
Figure 8