Wiki Home Settings page QR topup with Razorpay
QR topup with Razorpay
2025-04-01
qr, topup, pay, razorpay
The following guide explains how to retrieve your Razorpay account details and connect it to iCafeCloud for QR payments.
Server Side
- Log in to the Razorpay website with your credentials, scroll to the bottom of the page, and click on "Account & Settings", then select API keys (Figure 1)

Figure 1
- On the API Keys page, click "Add Website/App URL" and enter your business website to verify and generate an API key. This key will be used later in the iCafeCloud admin settings.(Figure 2)
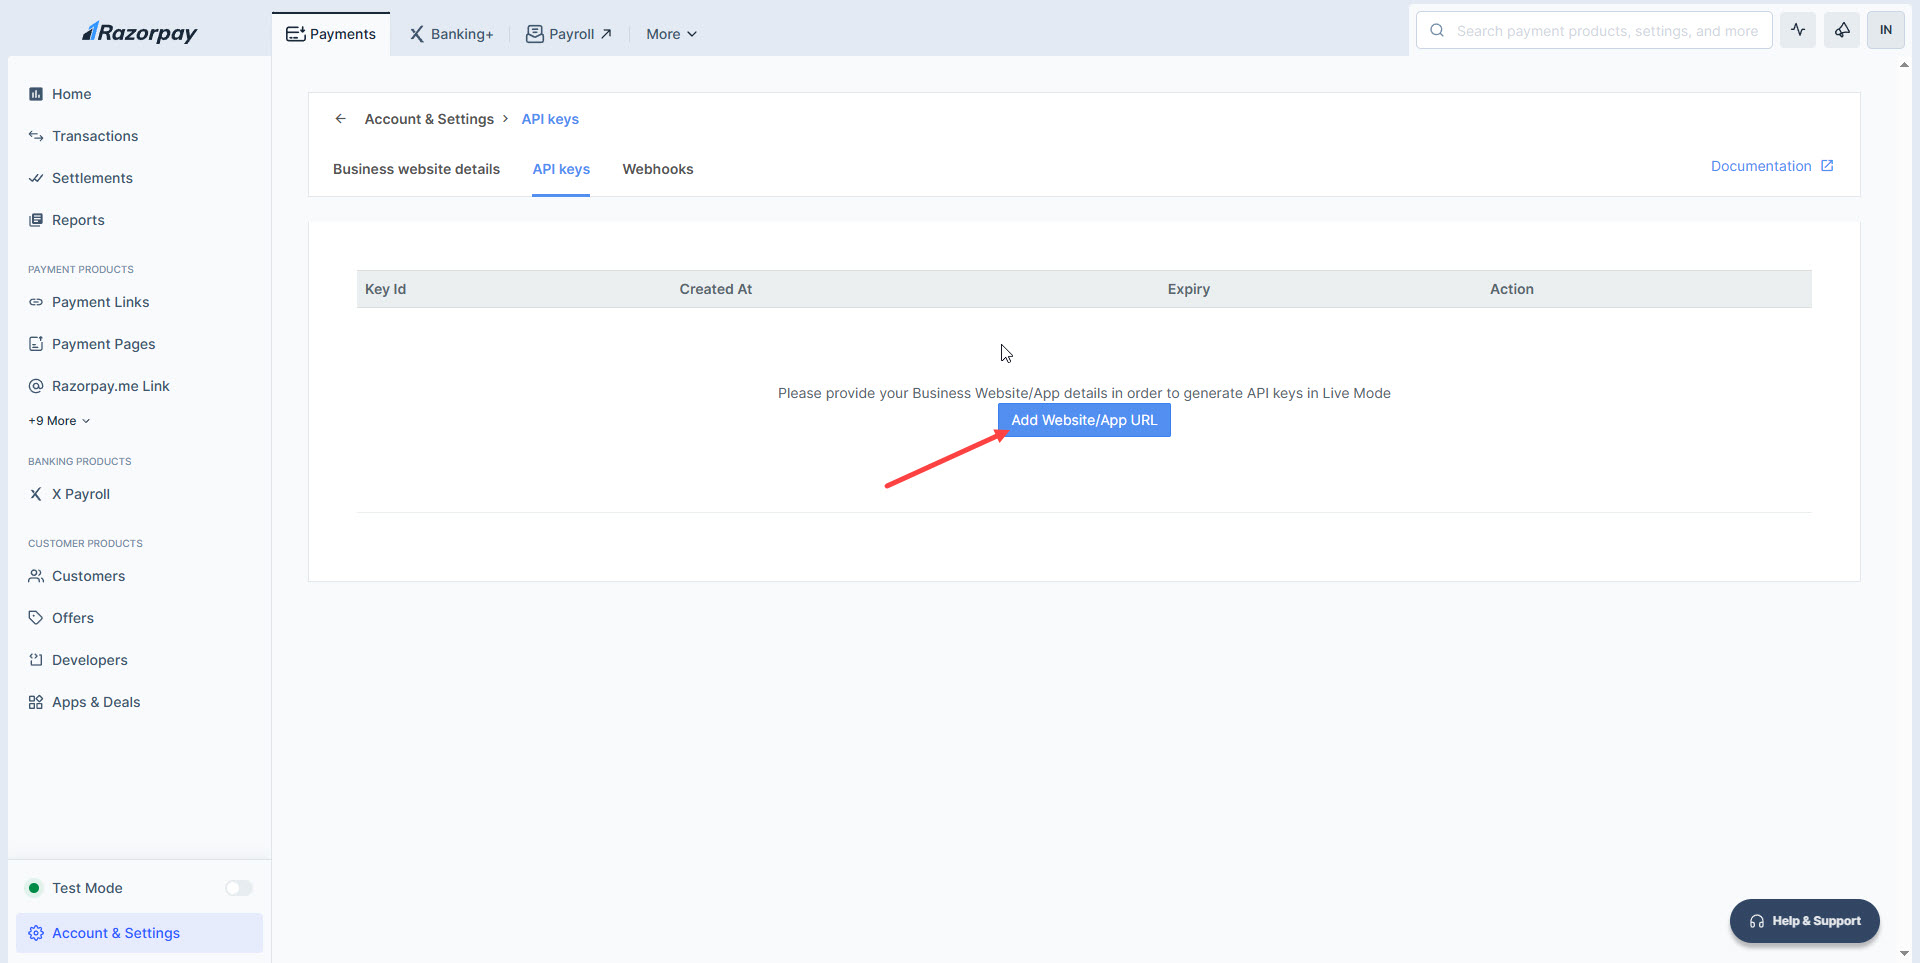
Figure 2
- Go back on the main page and click on "Account & Settings" and "Webhooks".(Figure 3)
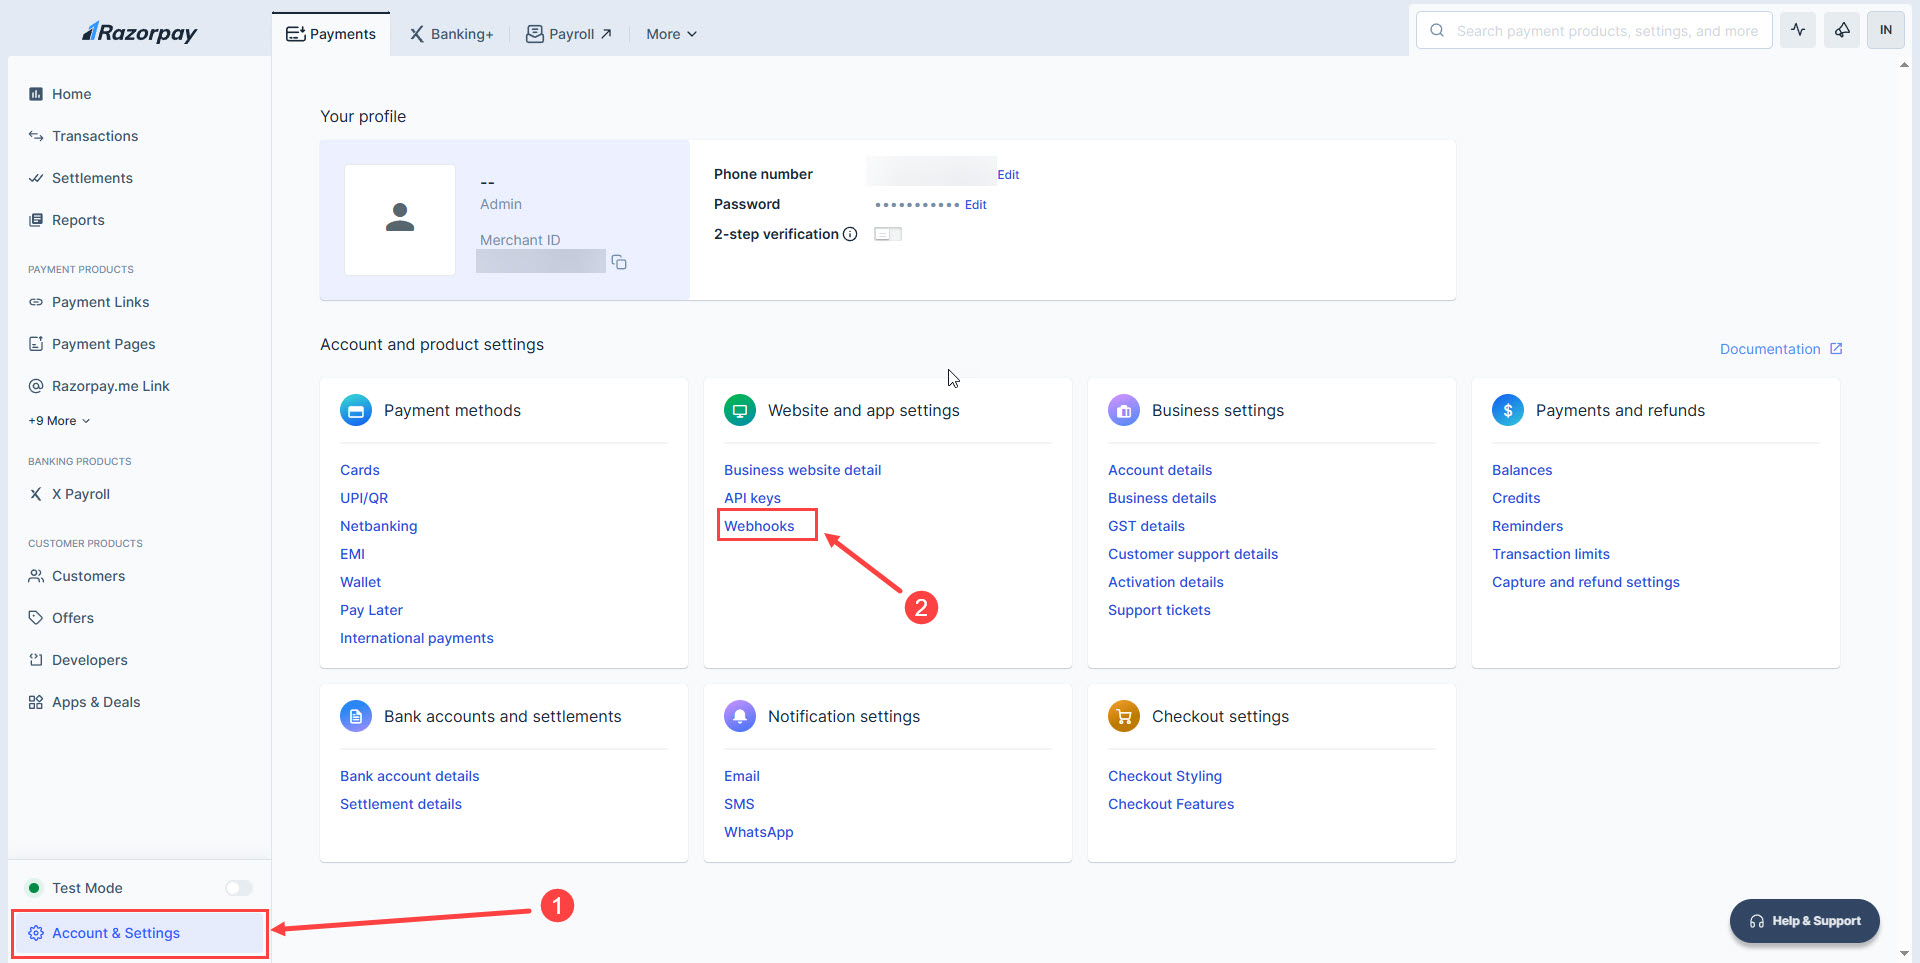
Figure 3
- On the Webhook page, click "Add New Webhook".(Figure 4)
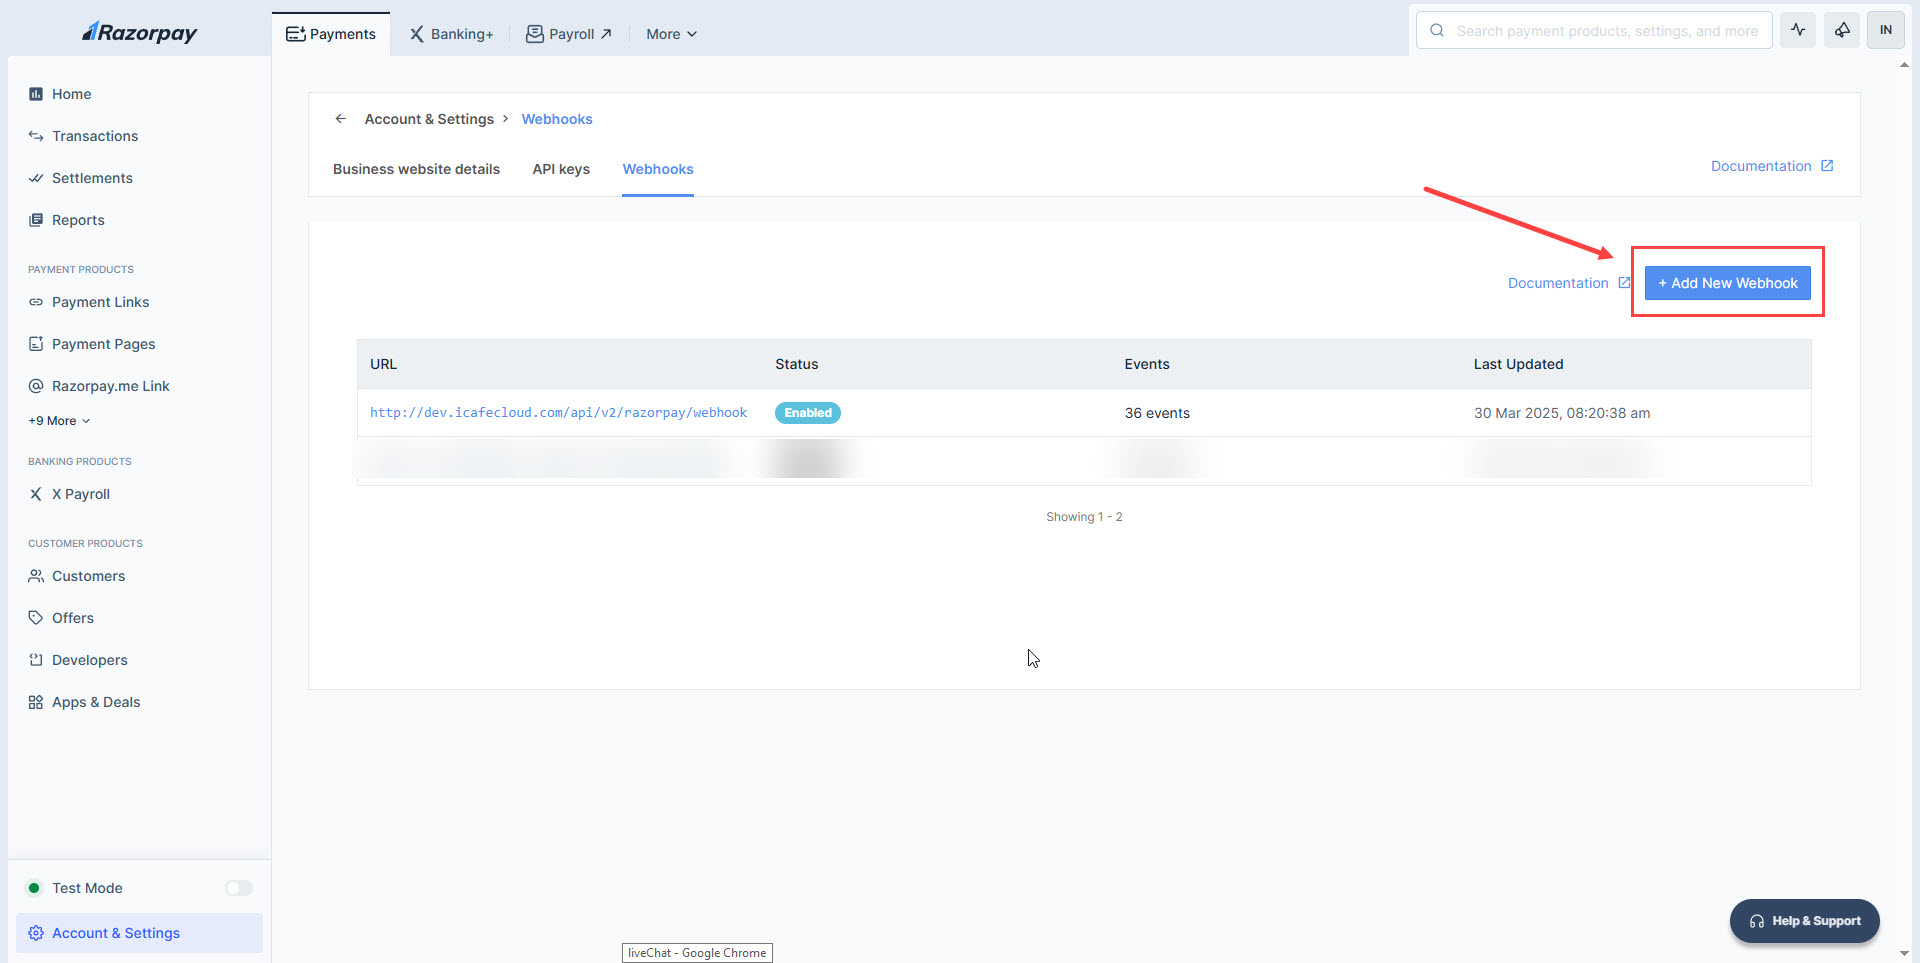
Figure 4
- Copy and paste the following link into the webhook URL field: http://cp.icafecloud.com/api/v2/razorpay/webhook
- In the Secret field, generate a password and save it. You will need to add this later in the iCafeCloud web panel.
- Add your email address
- Select all active event and finally click save webhook (Figure 5)
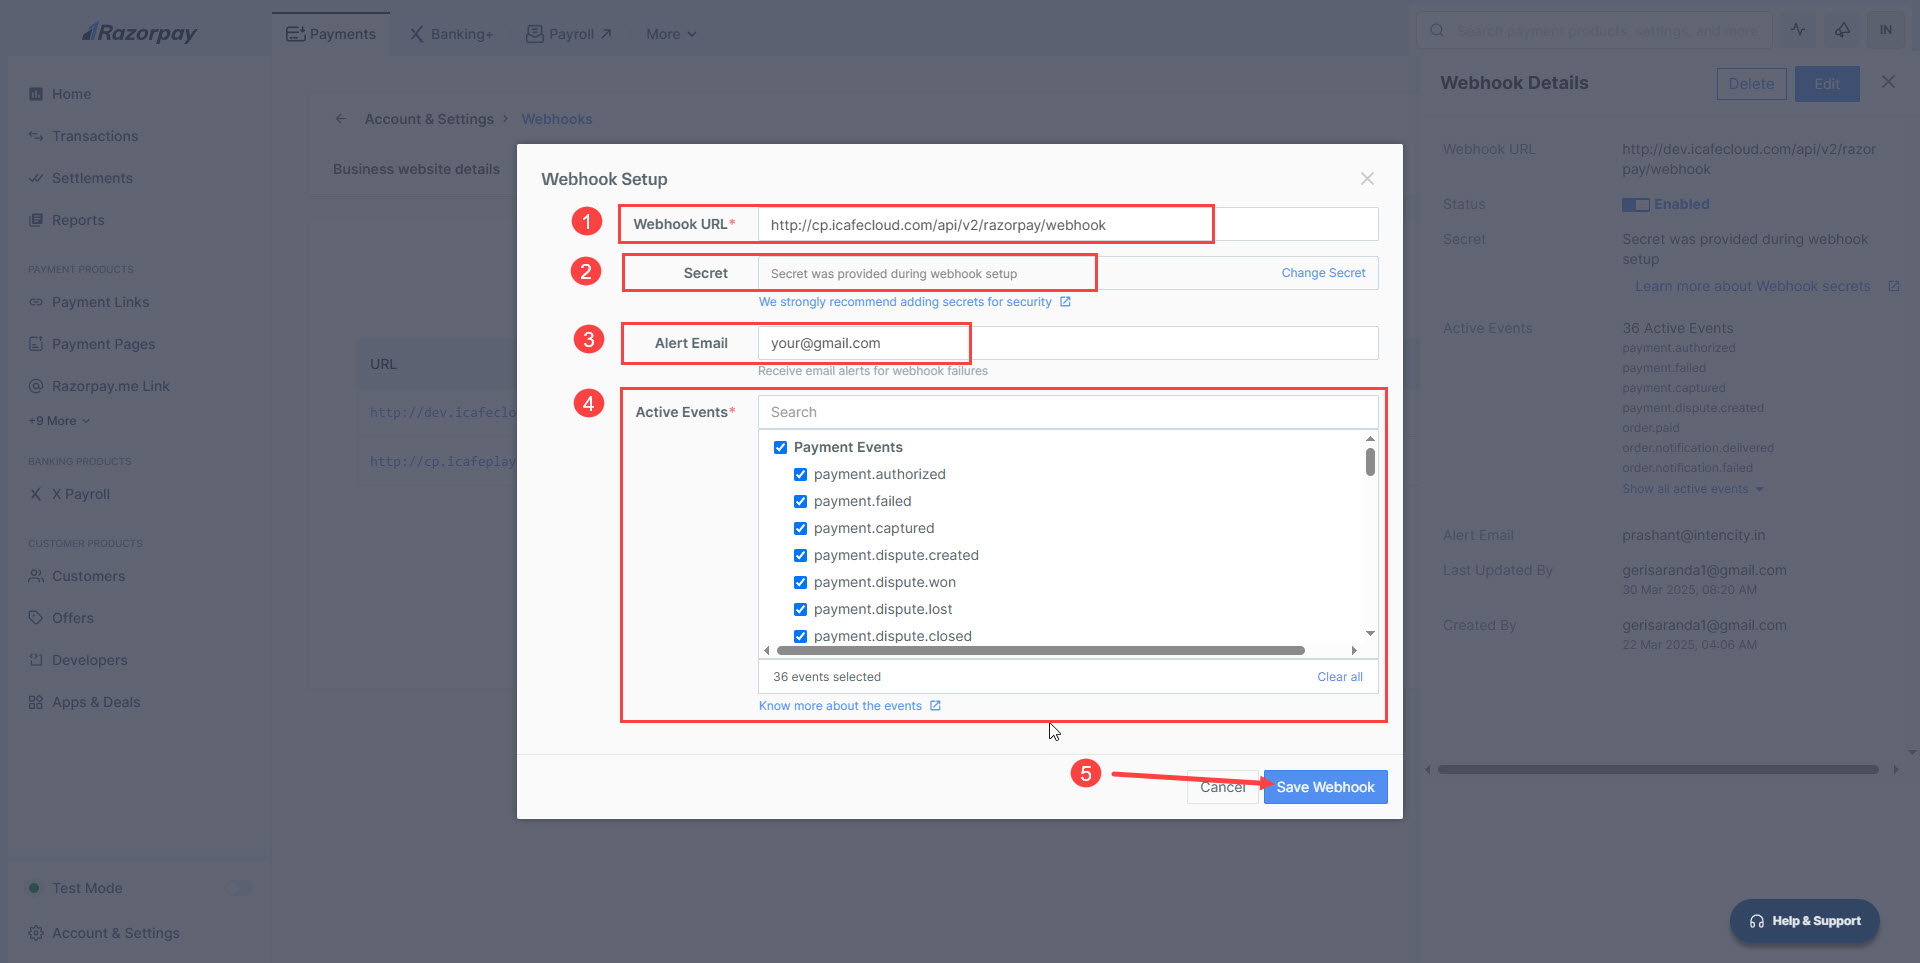
Figure 5
- Once set up, the Webhook will appear as enabled(Figure 6)
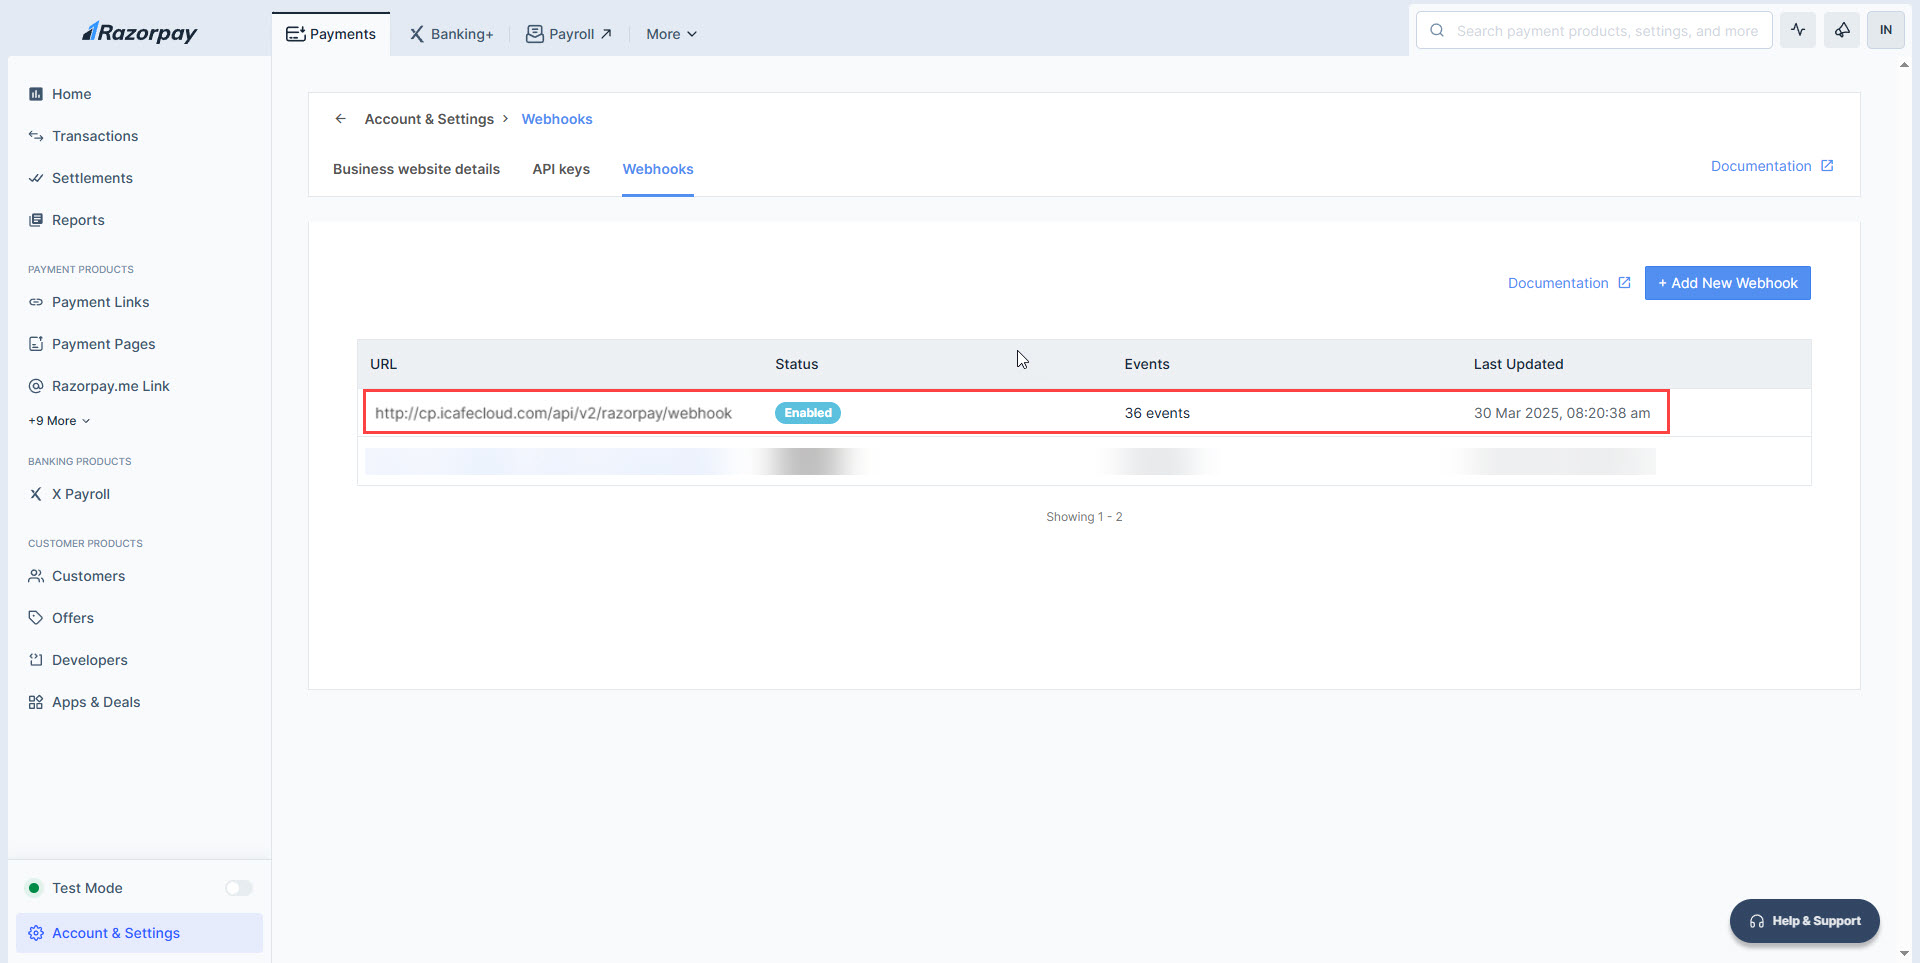
Figure 6
- Open cp.icafecloud.com and navigate to the Settings page.
- Go to Client Settings and enable "Allow Top-up at Client".
- Next to it, select Razorpay as the Payment Gateway.
- In "Razorpay Key ID", enter the key from the Razorpay website.
- In "Razorpay Secret Key", enter the secret key created earlier on Razorpay.(Figure 7)
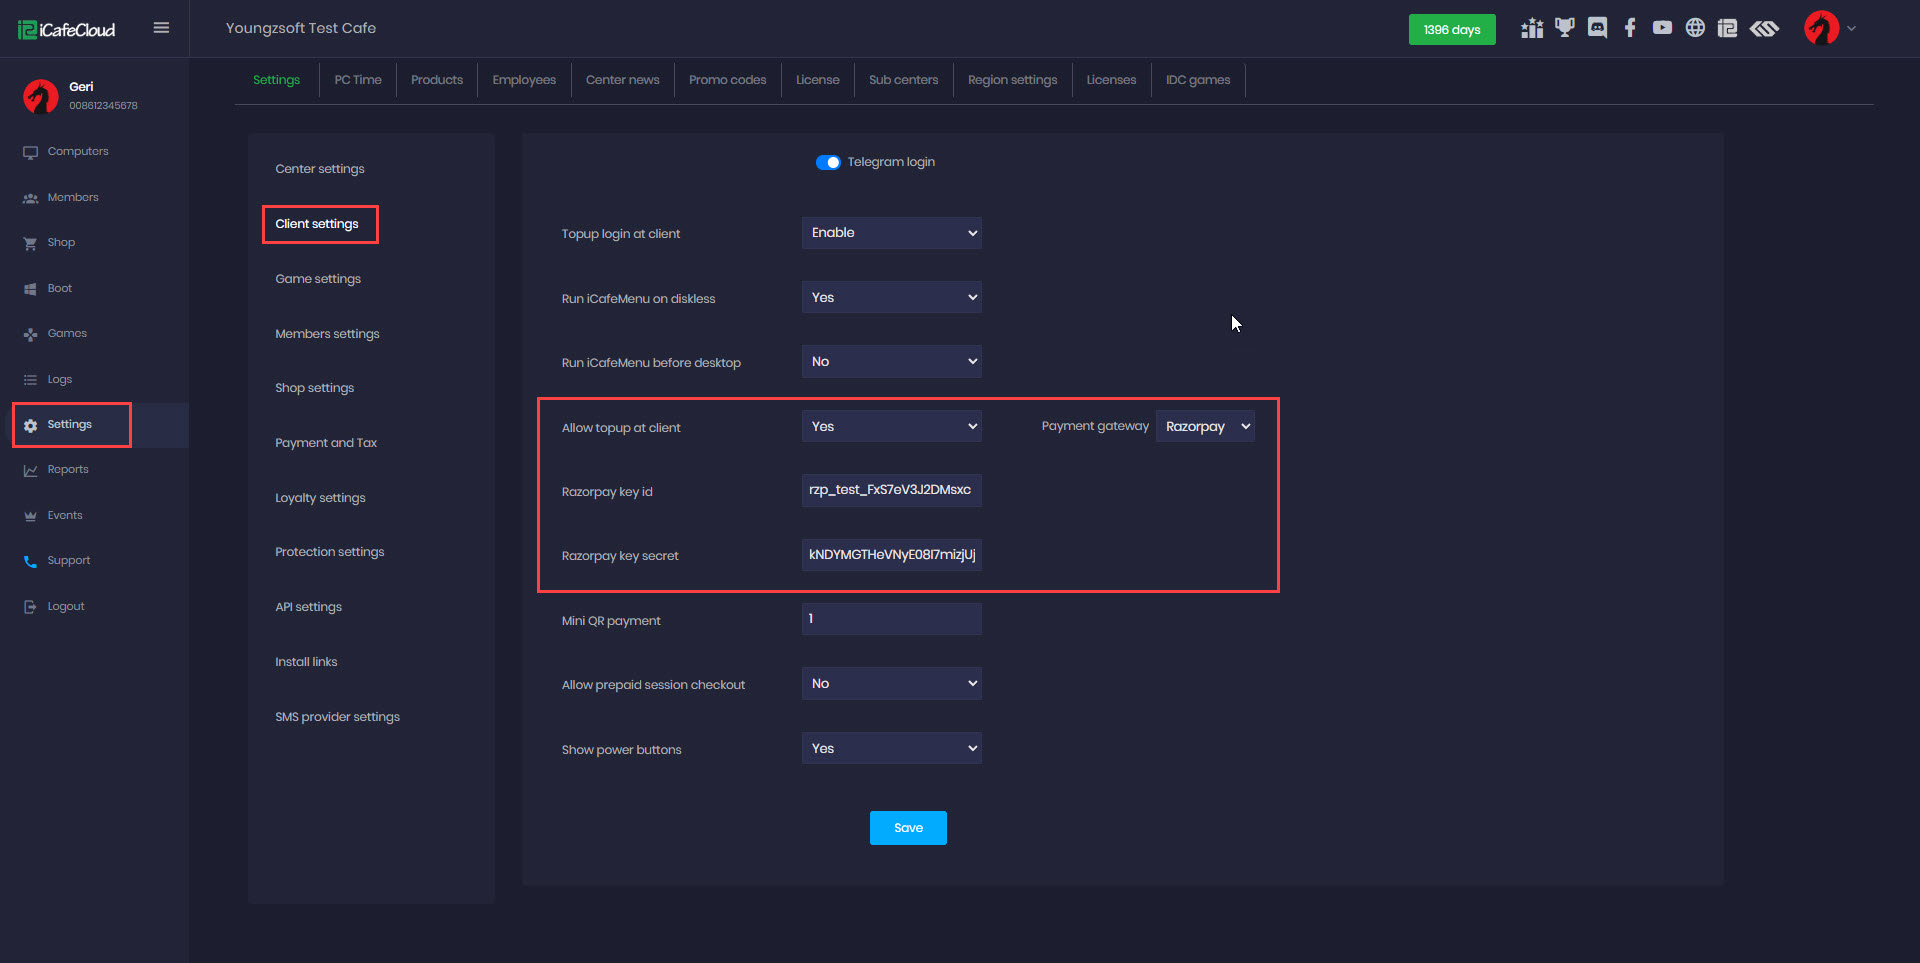
Figure 7
Client side
- On the Client interface, click the Top-up button.(Figure 8)
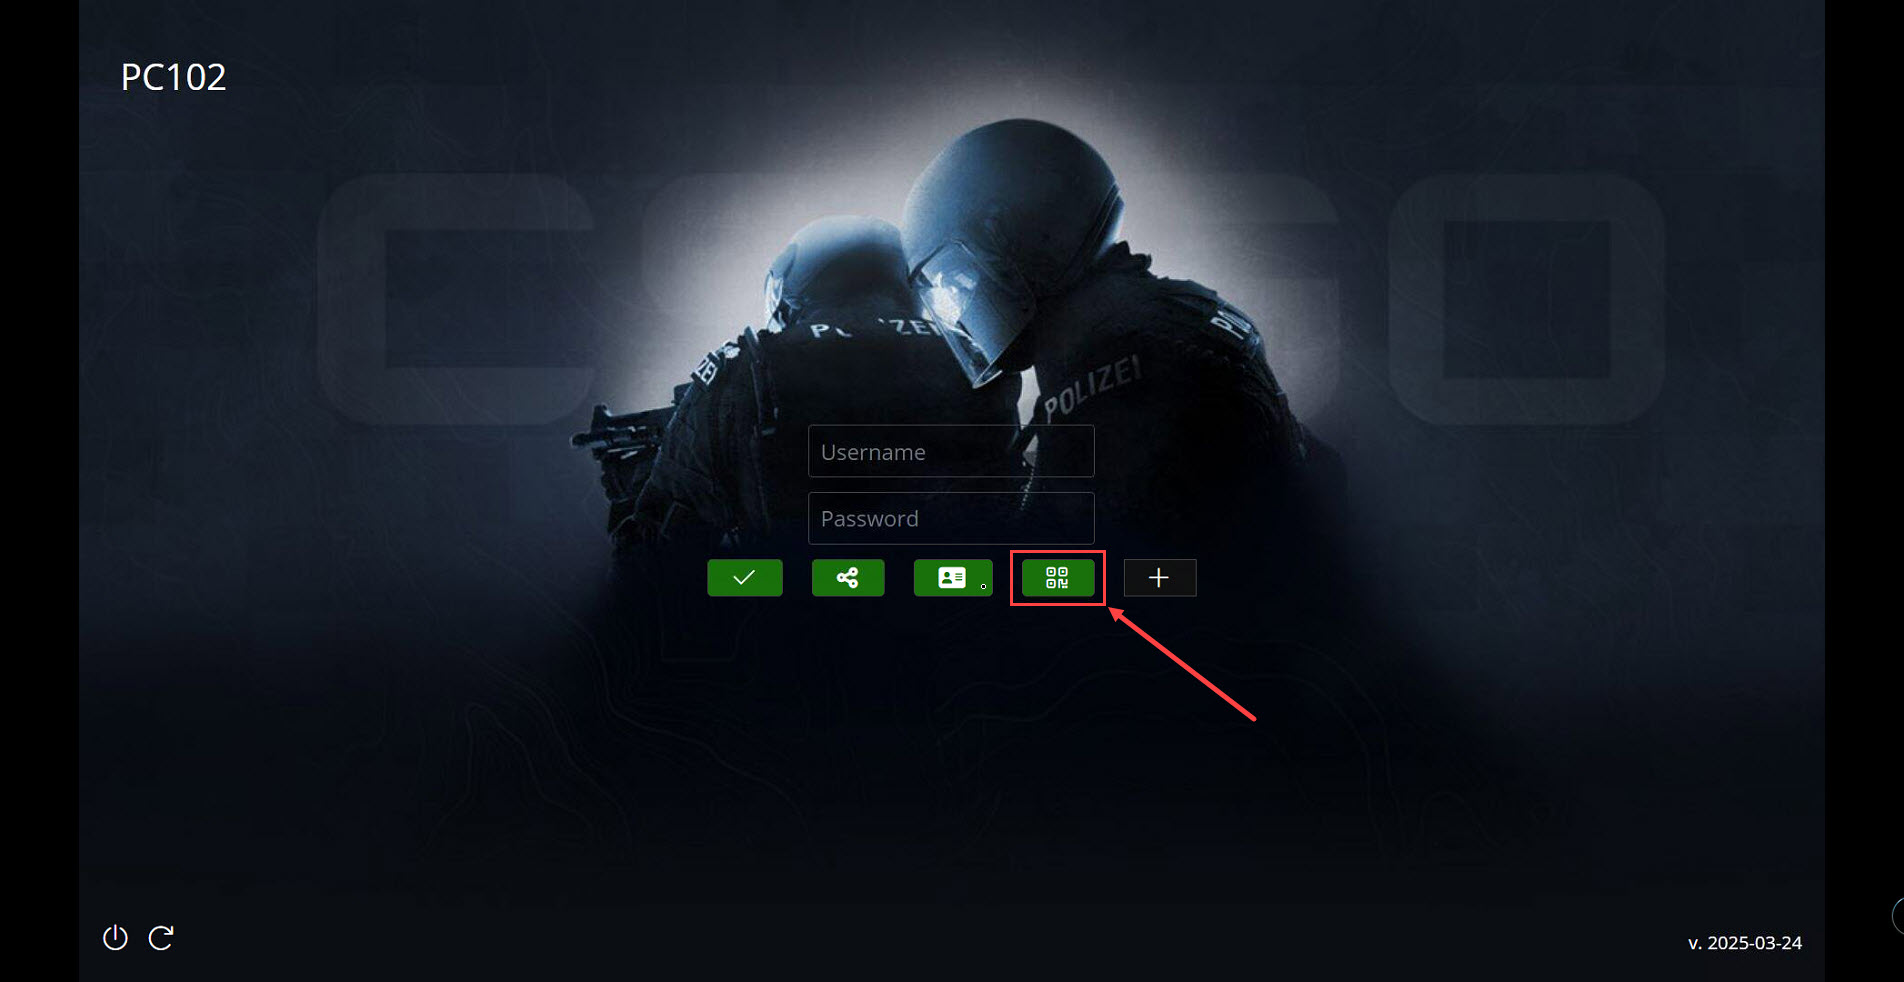
Figure 8
- Enter the amount you want to top up in your local currency, then click Submit. (Figure 9)
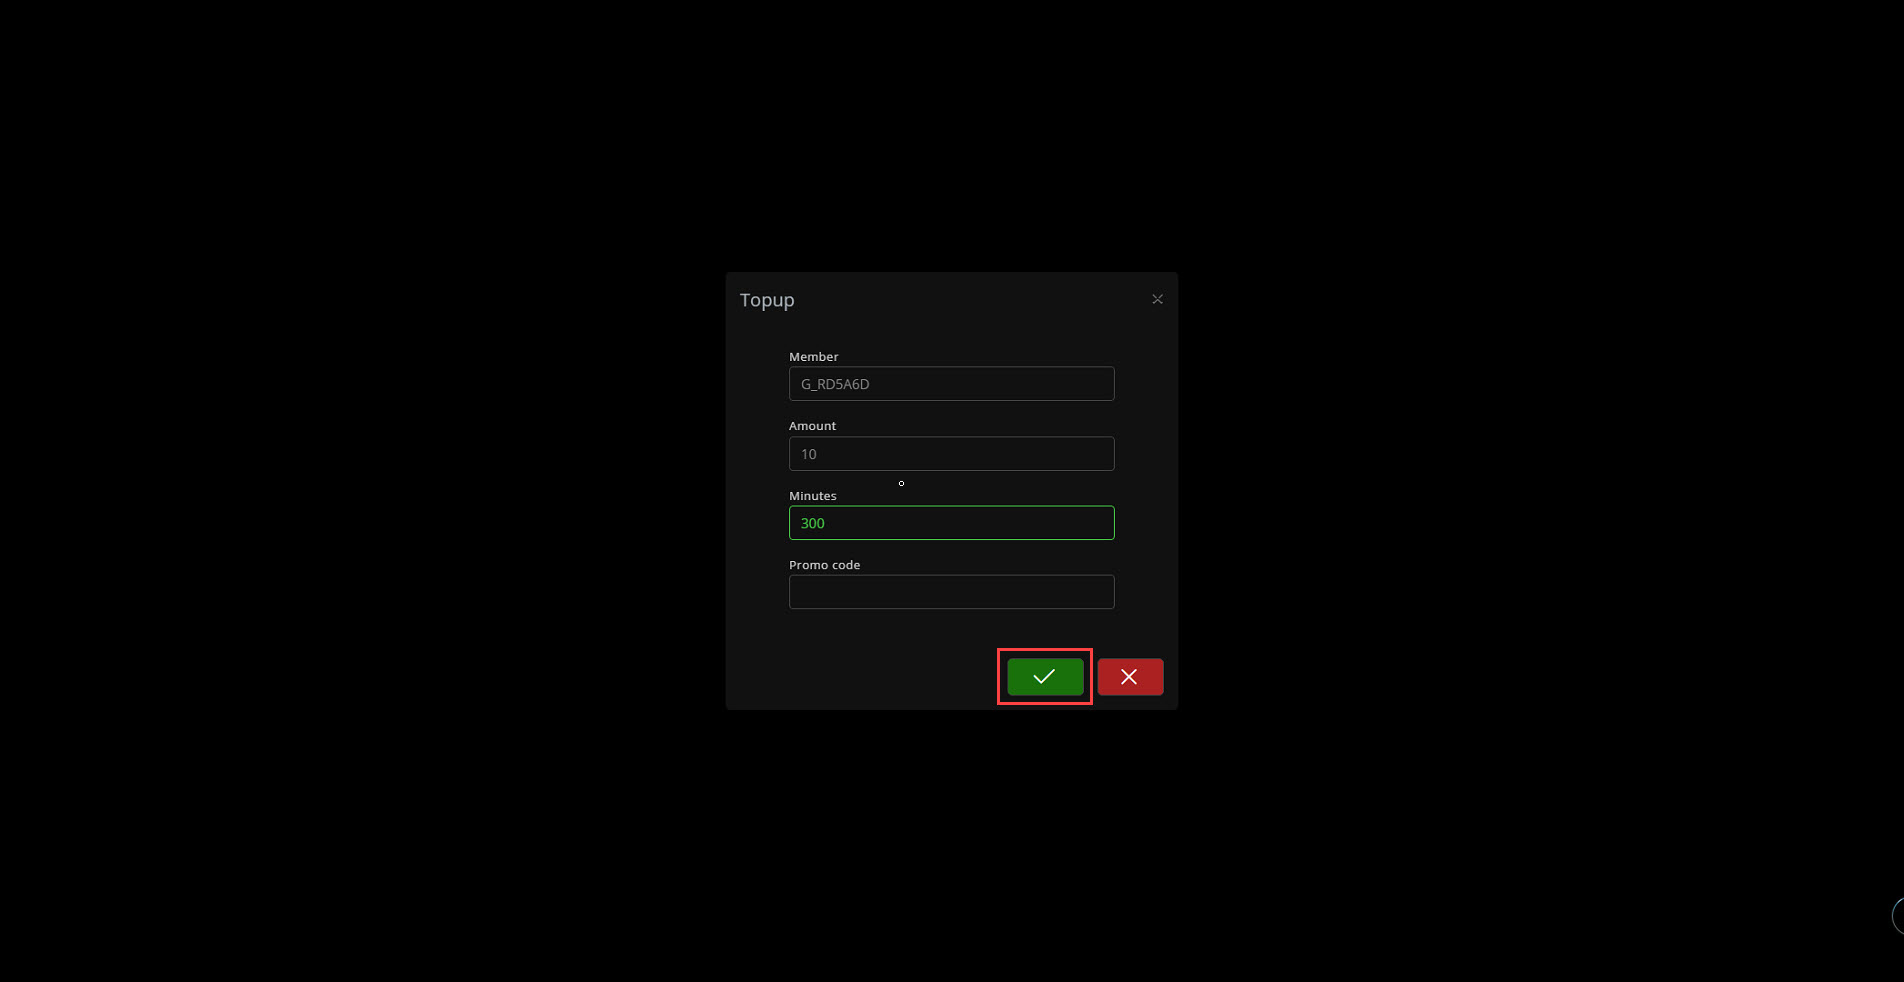
Figure 9
- A QR code will be generated to process the Razorpay payment. Scan it, and you will be redirected to the Razorpay app to complete the payment.(Figure 10)
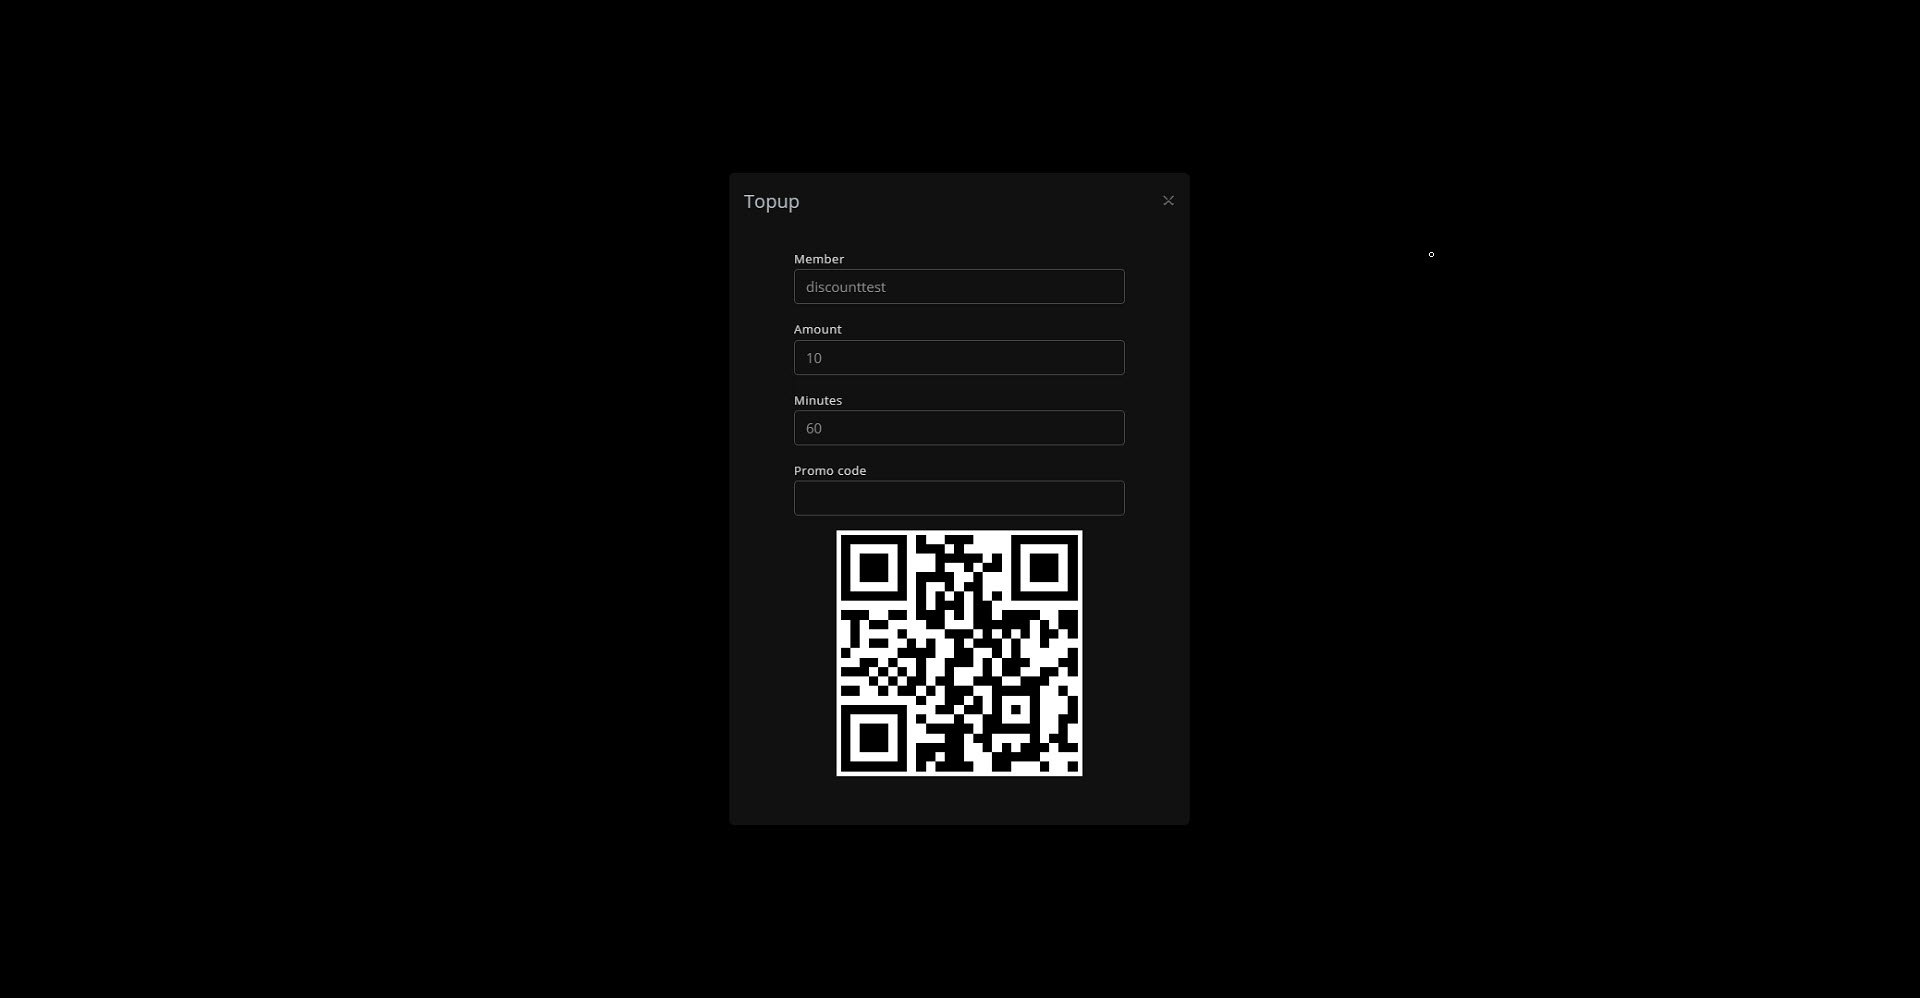
Figure 10