Wiki Home Installation and login Billiard create rooms and tables
Billiard create rooms and tables
2025-01-04
billiard, rooms, tables
The following explains how to create rooms and tables in billiard mode.
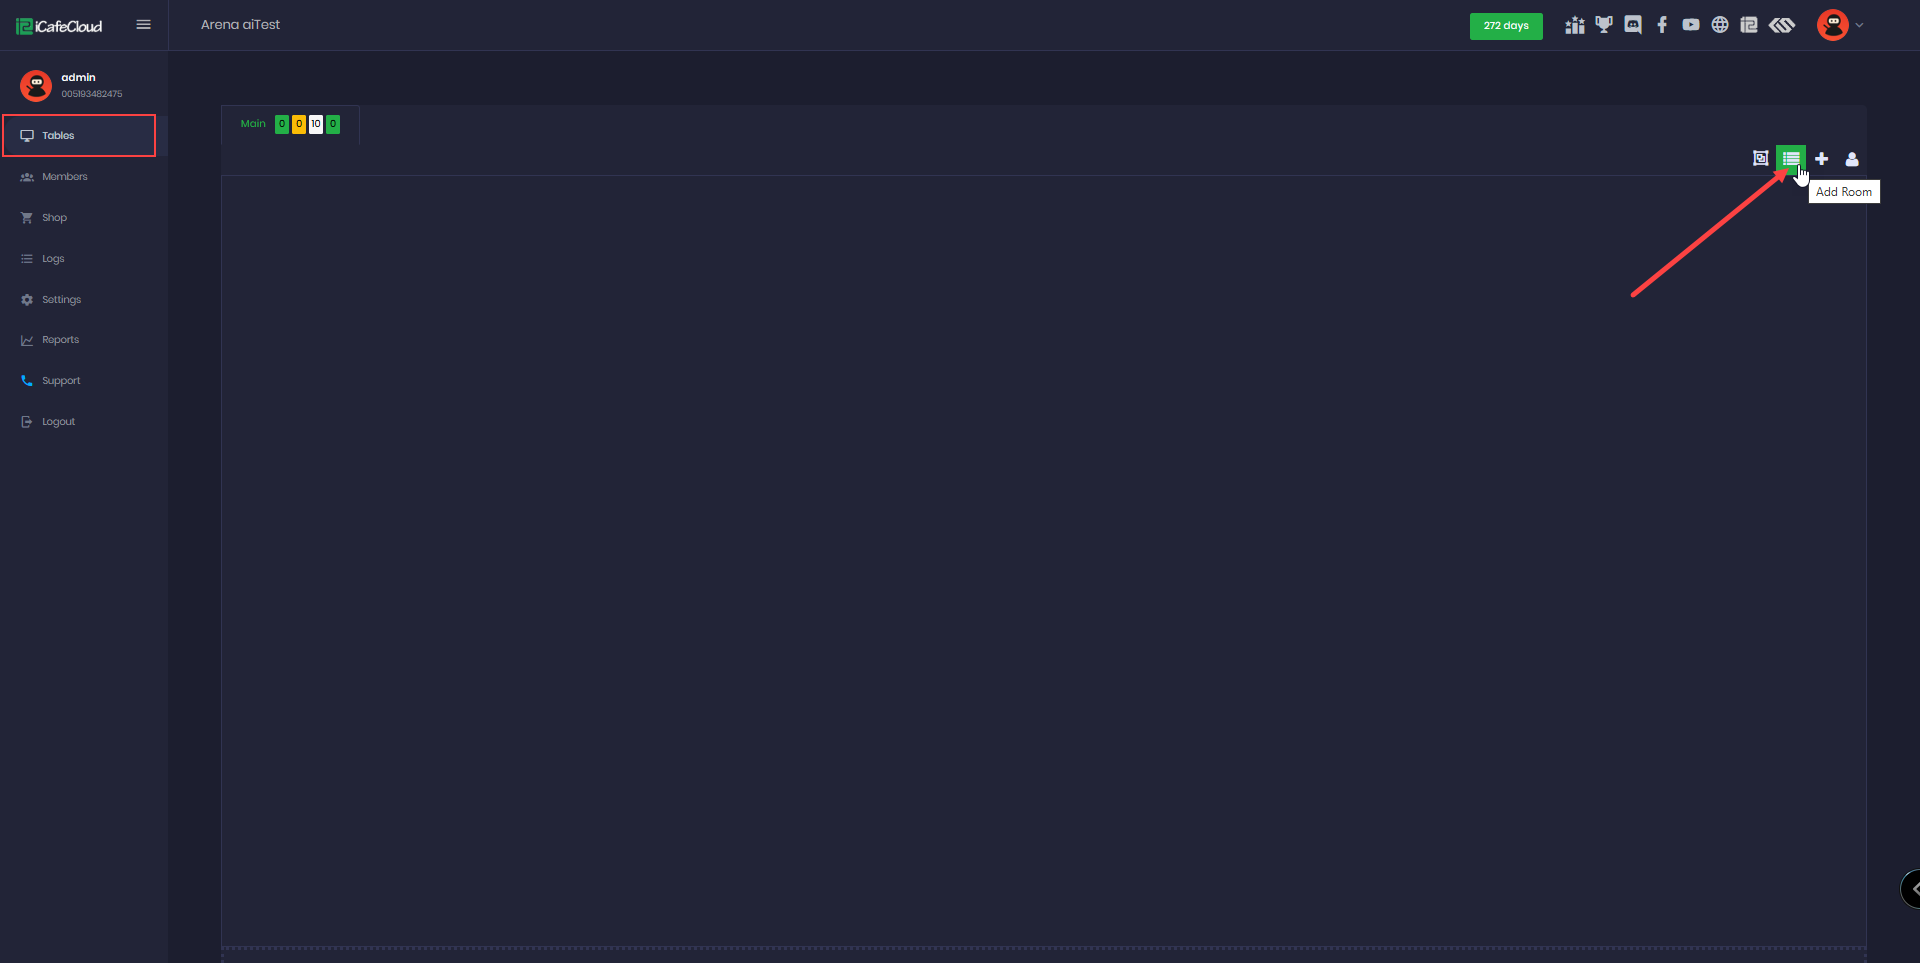
- To add a new room in the Table section of the iCafeCloud Admin Panel, look for a small list icon on the right side of the page. (Figure 1)
Figure 1
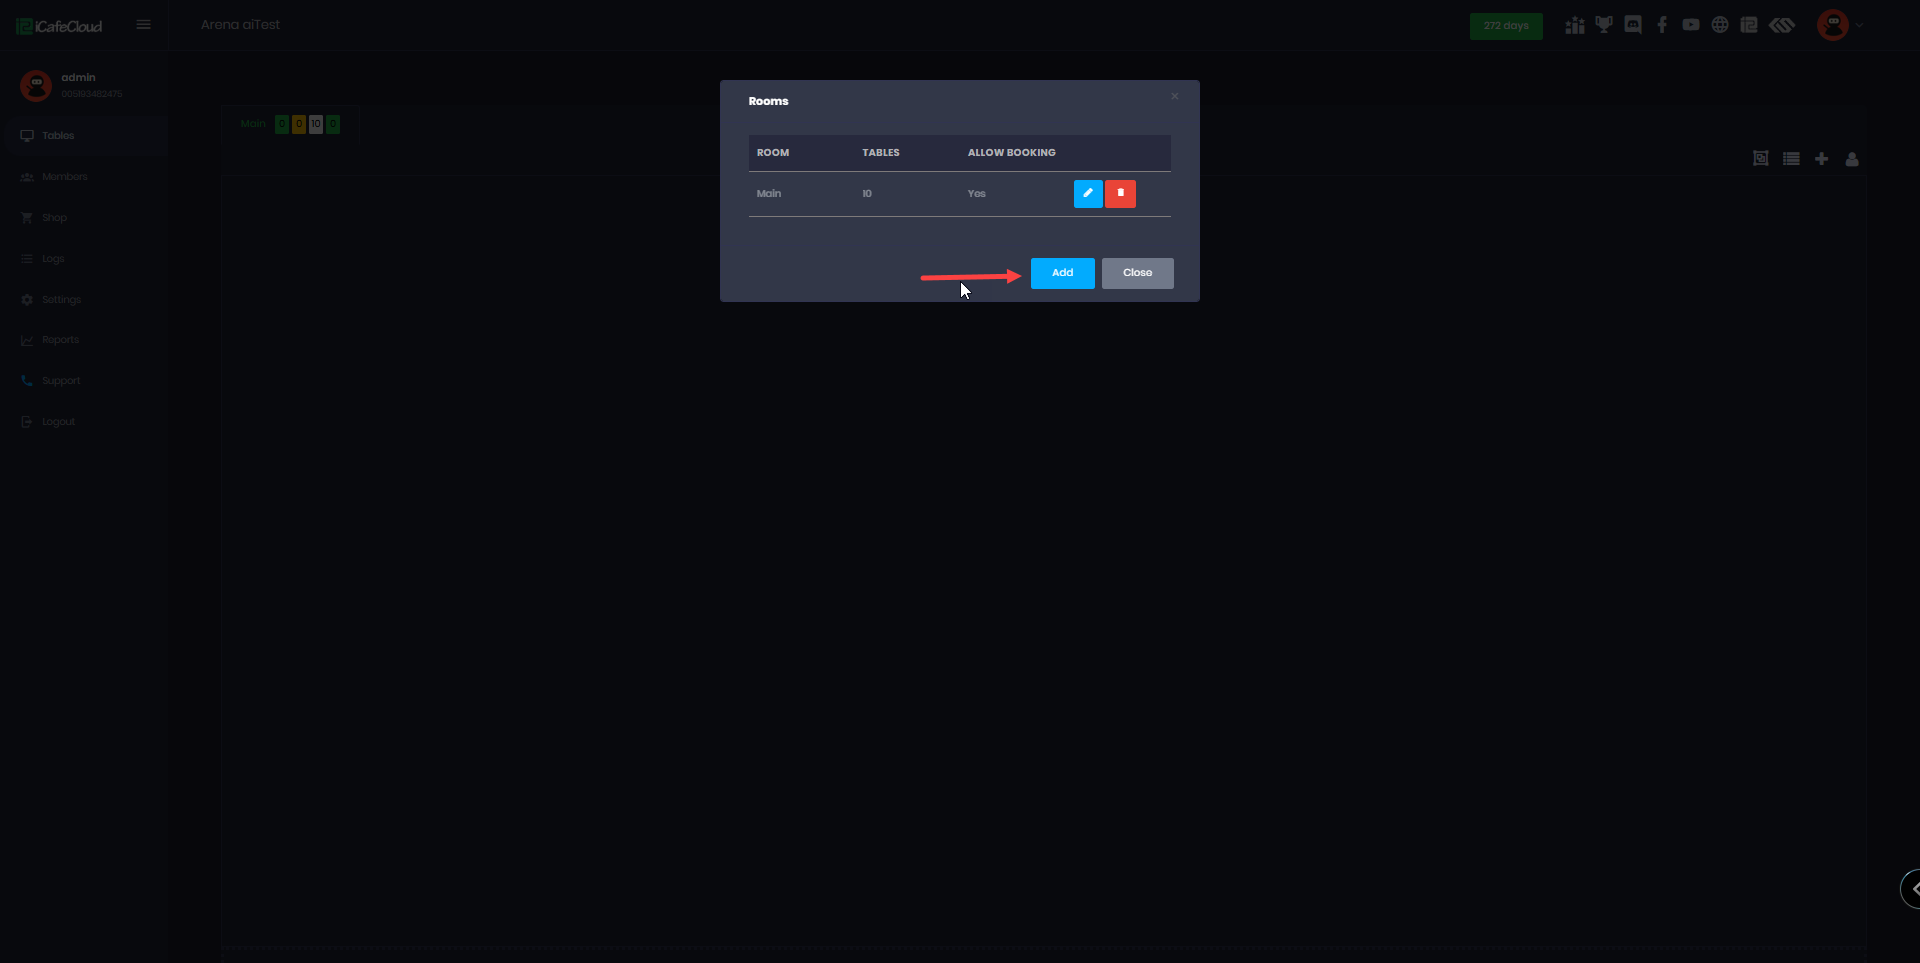
- Click the add Room button to open a popup window for creating a Billiard room. Then, click the Add button to create the new Room.(Figure 2)
Figure 2
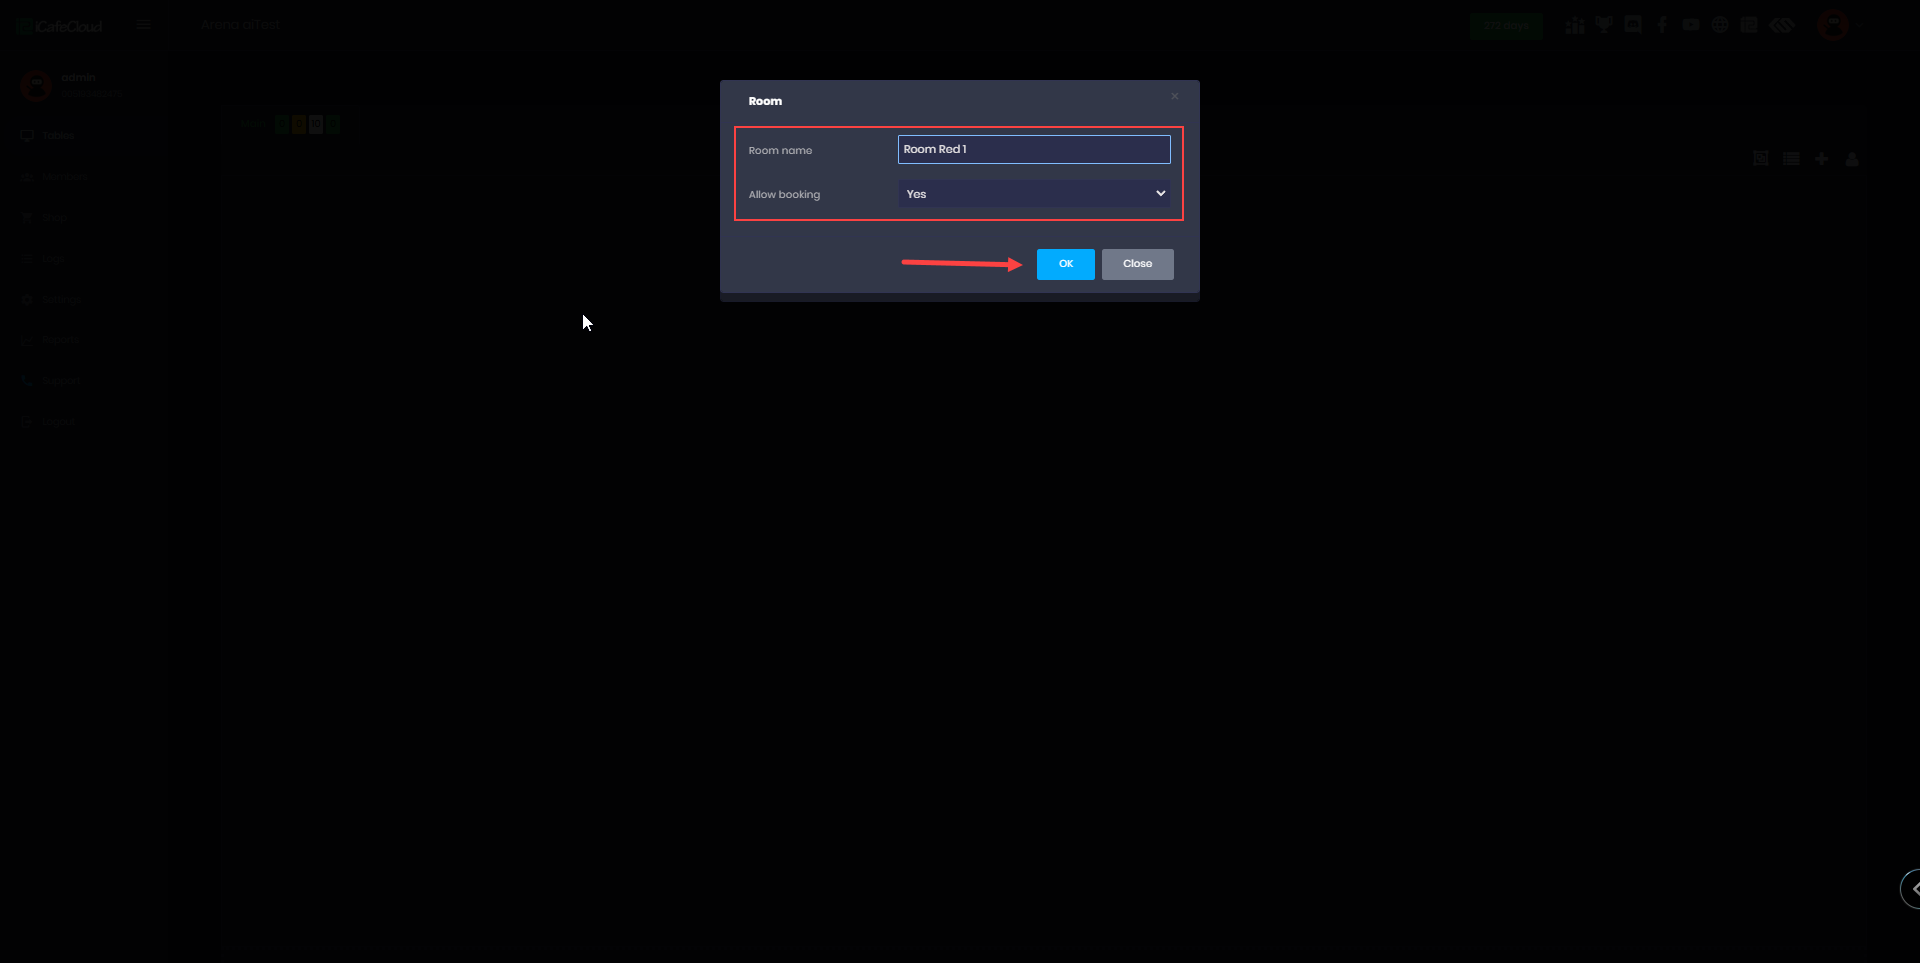
- In the Room popup window, you can specify a preferred name for the room and choose whether to enable booking for it or not. And click OK(Figure 3)
Figure 3
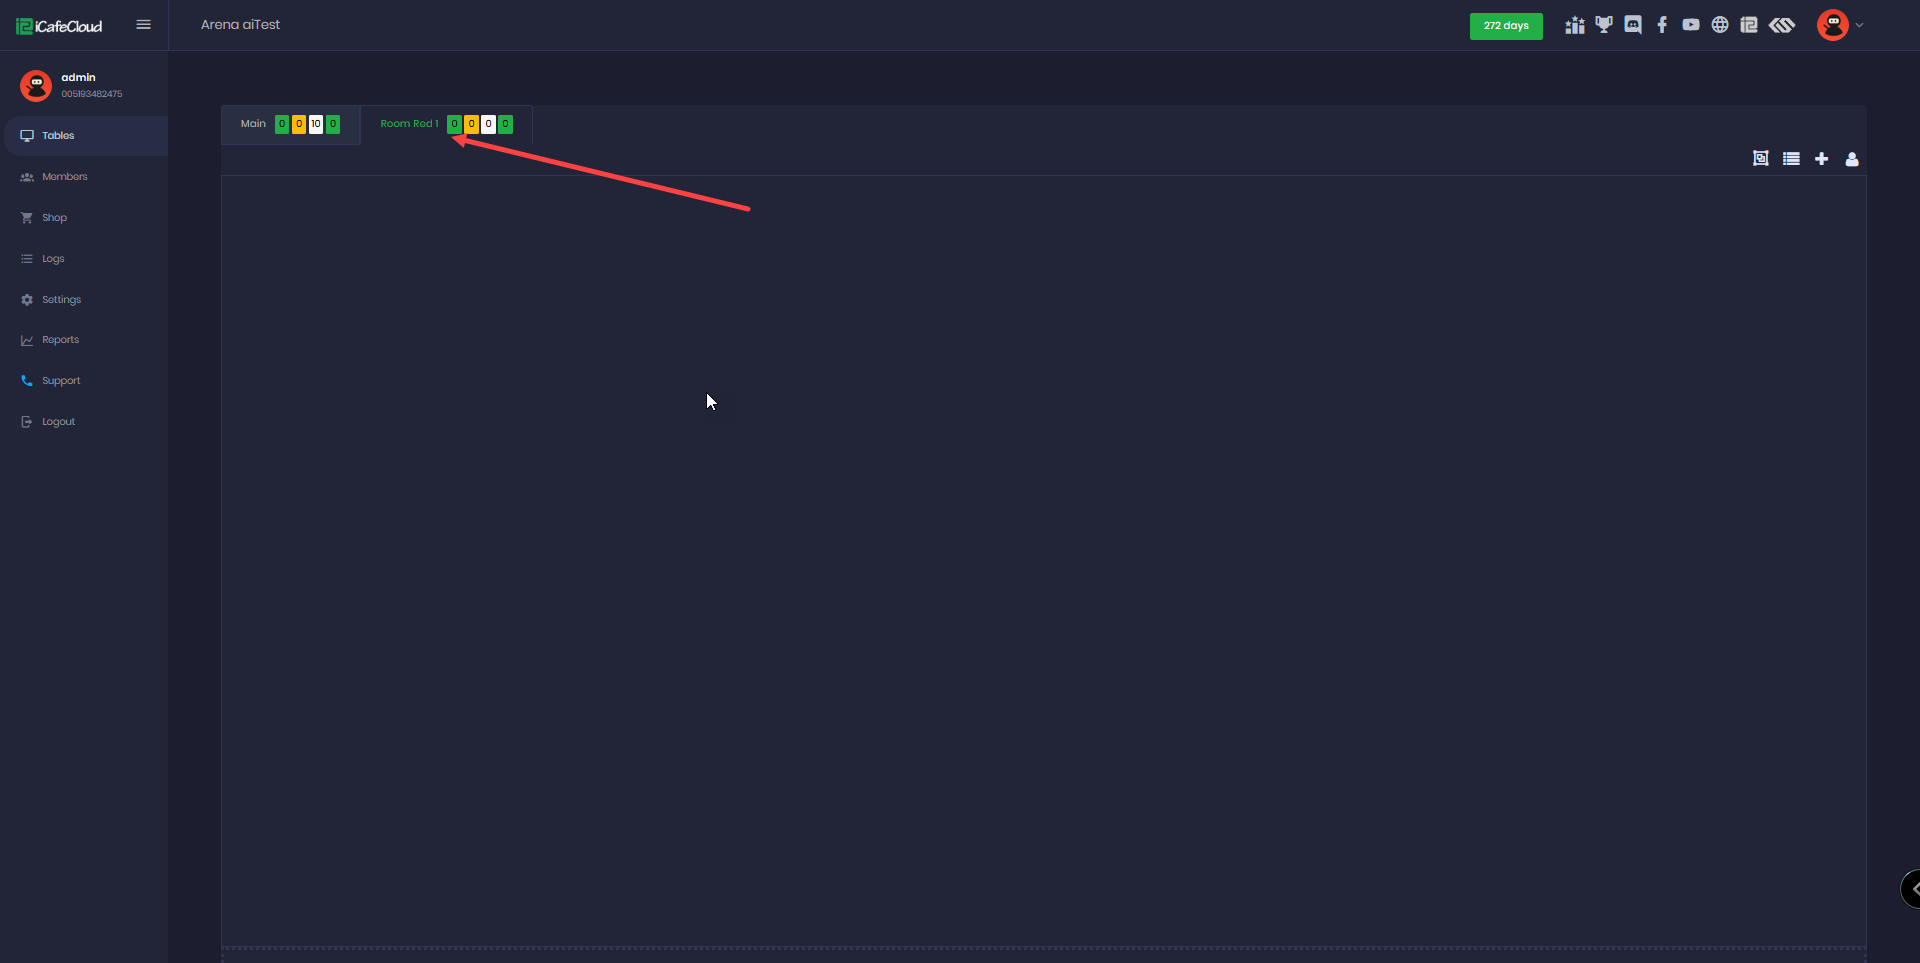
- Once the room is created, it will appear in the Table section.(Figure 4)
Figure 4
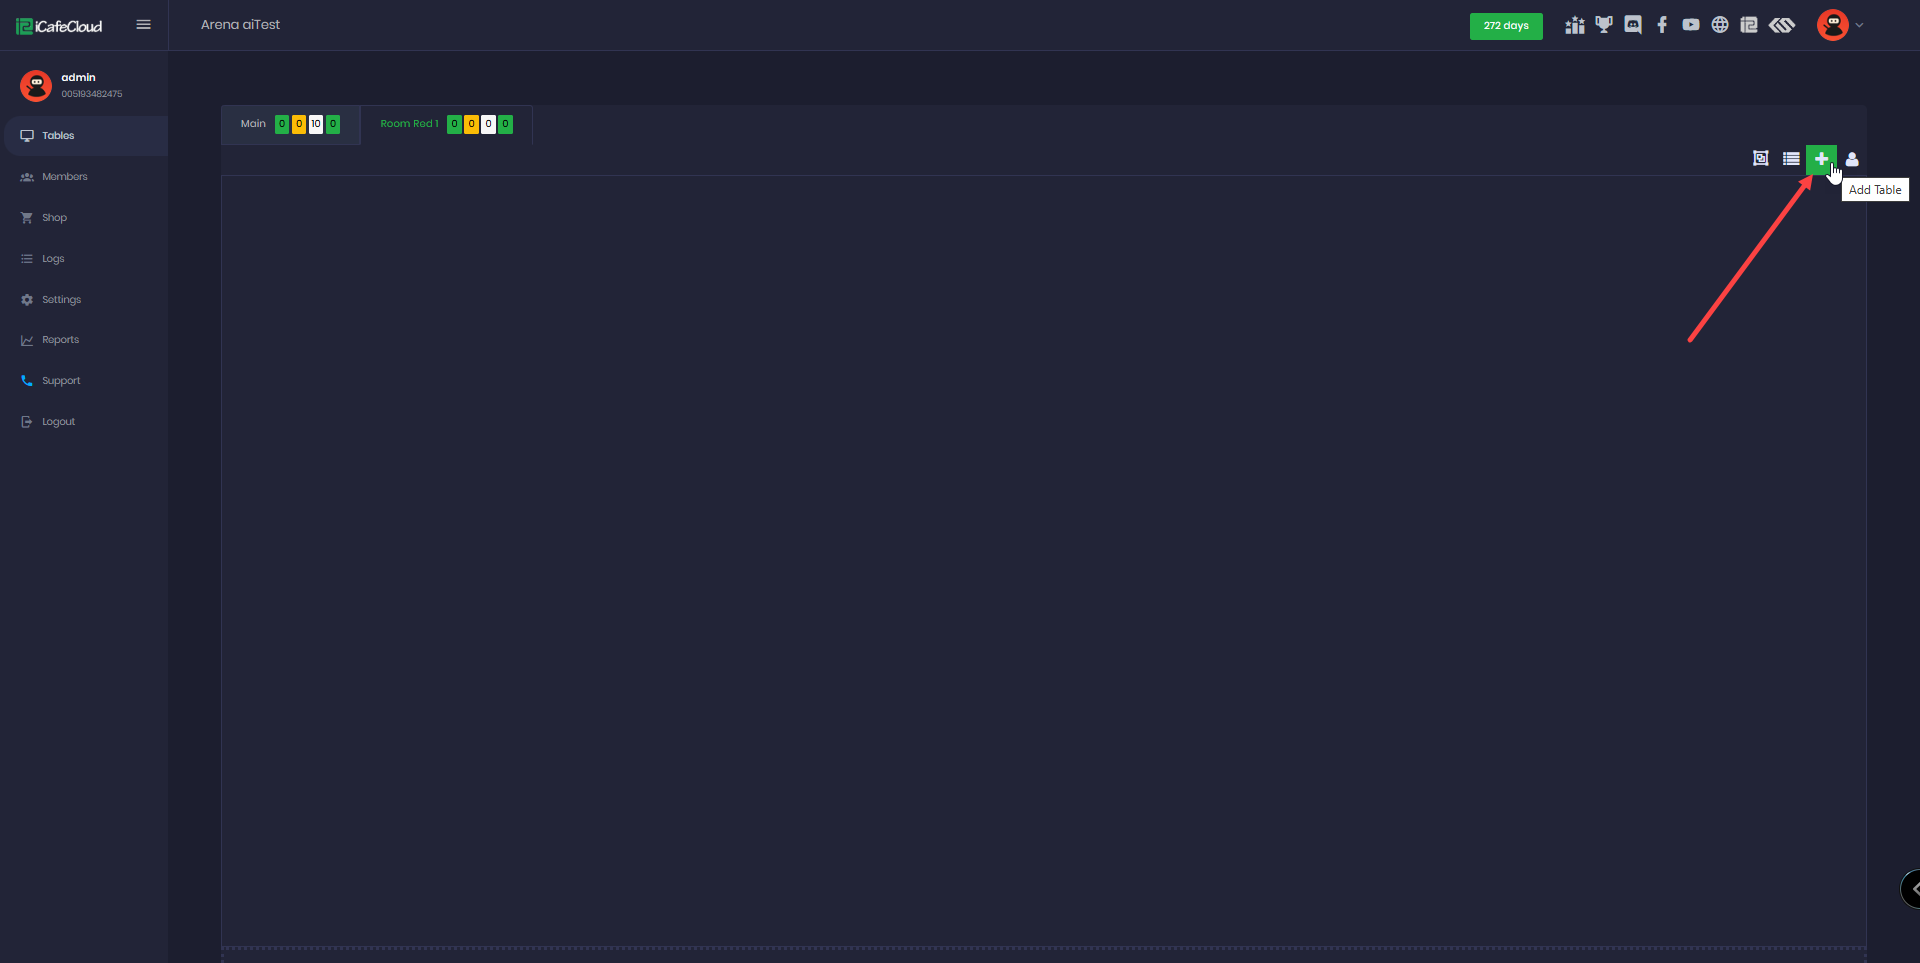
- Next to the Create Room icon, you'll find the Add Table icon with a plus symbol. Click on it to proceed.(Figure 5)
Figure 5
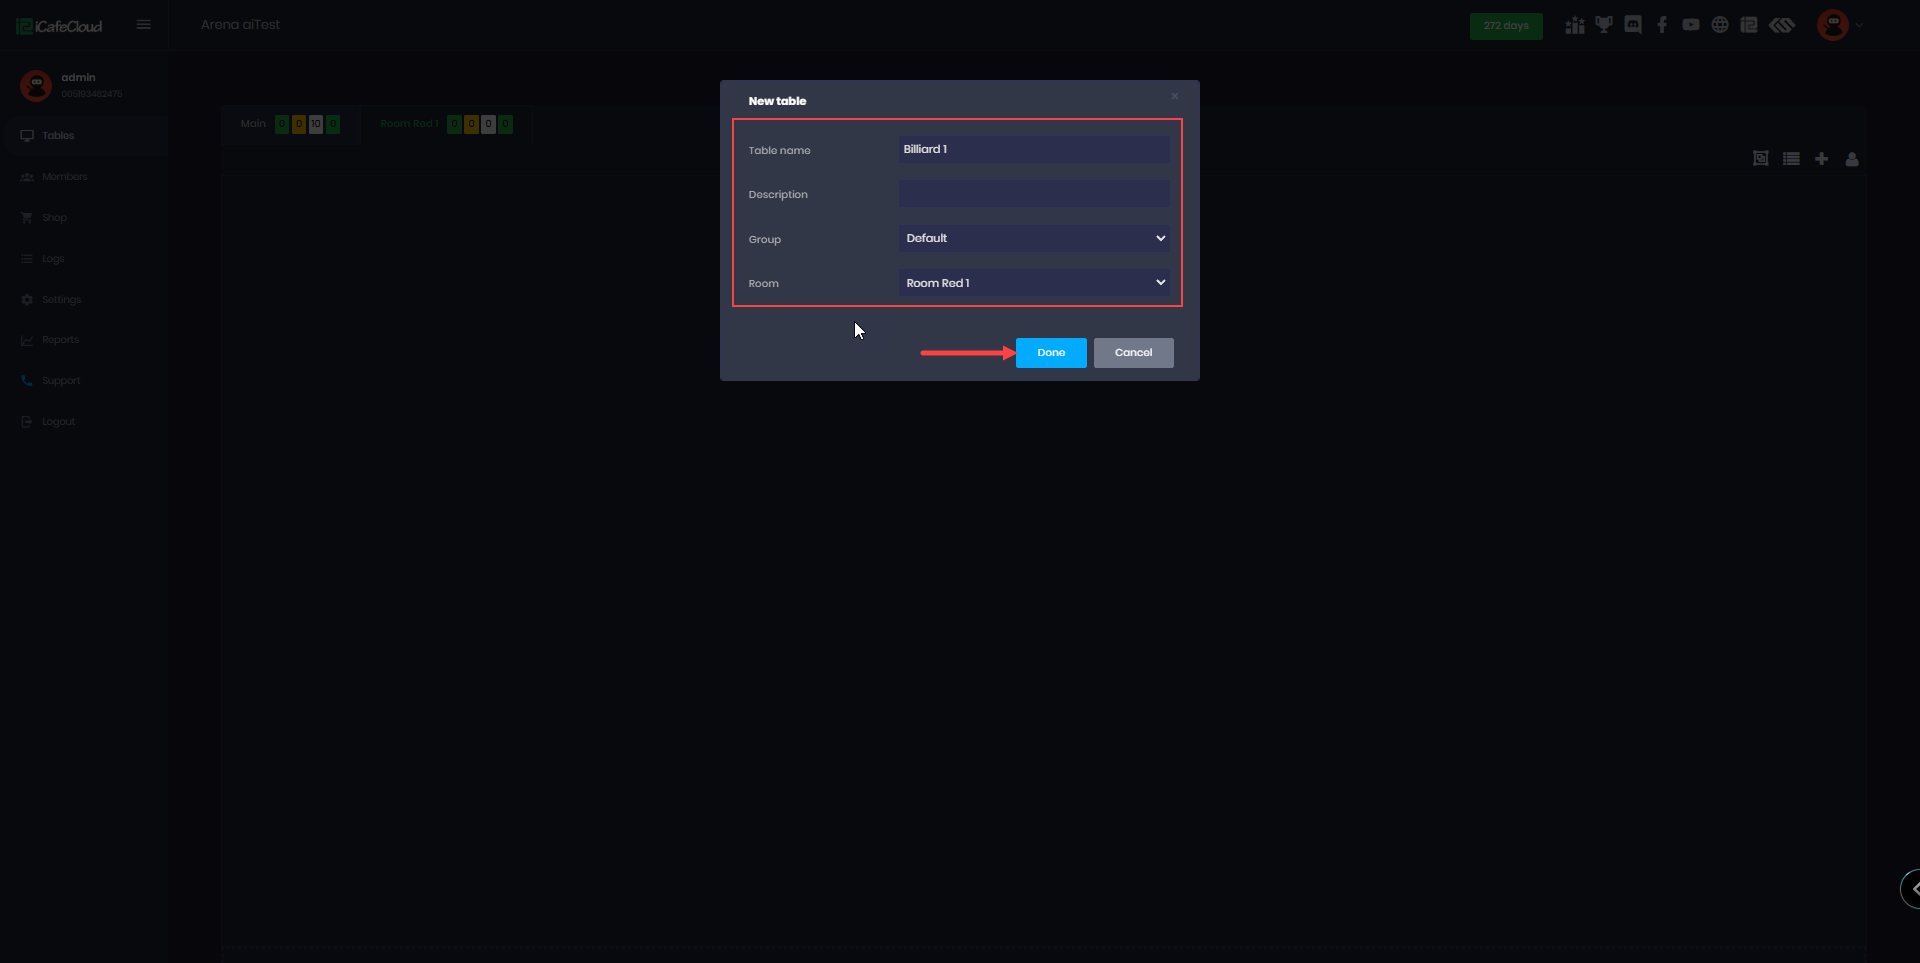
- In the New Table setup, enter your preferred Table Name and Description. Select the group you created earlier, or create a new one if you haven't done so yet. Then, choose the room we previously created in this guide and click DONE to finalize.(Figure 6)
Figure 6
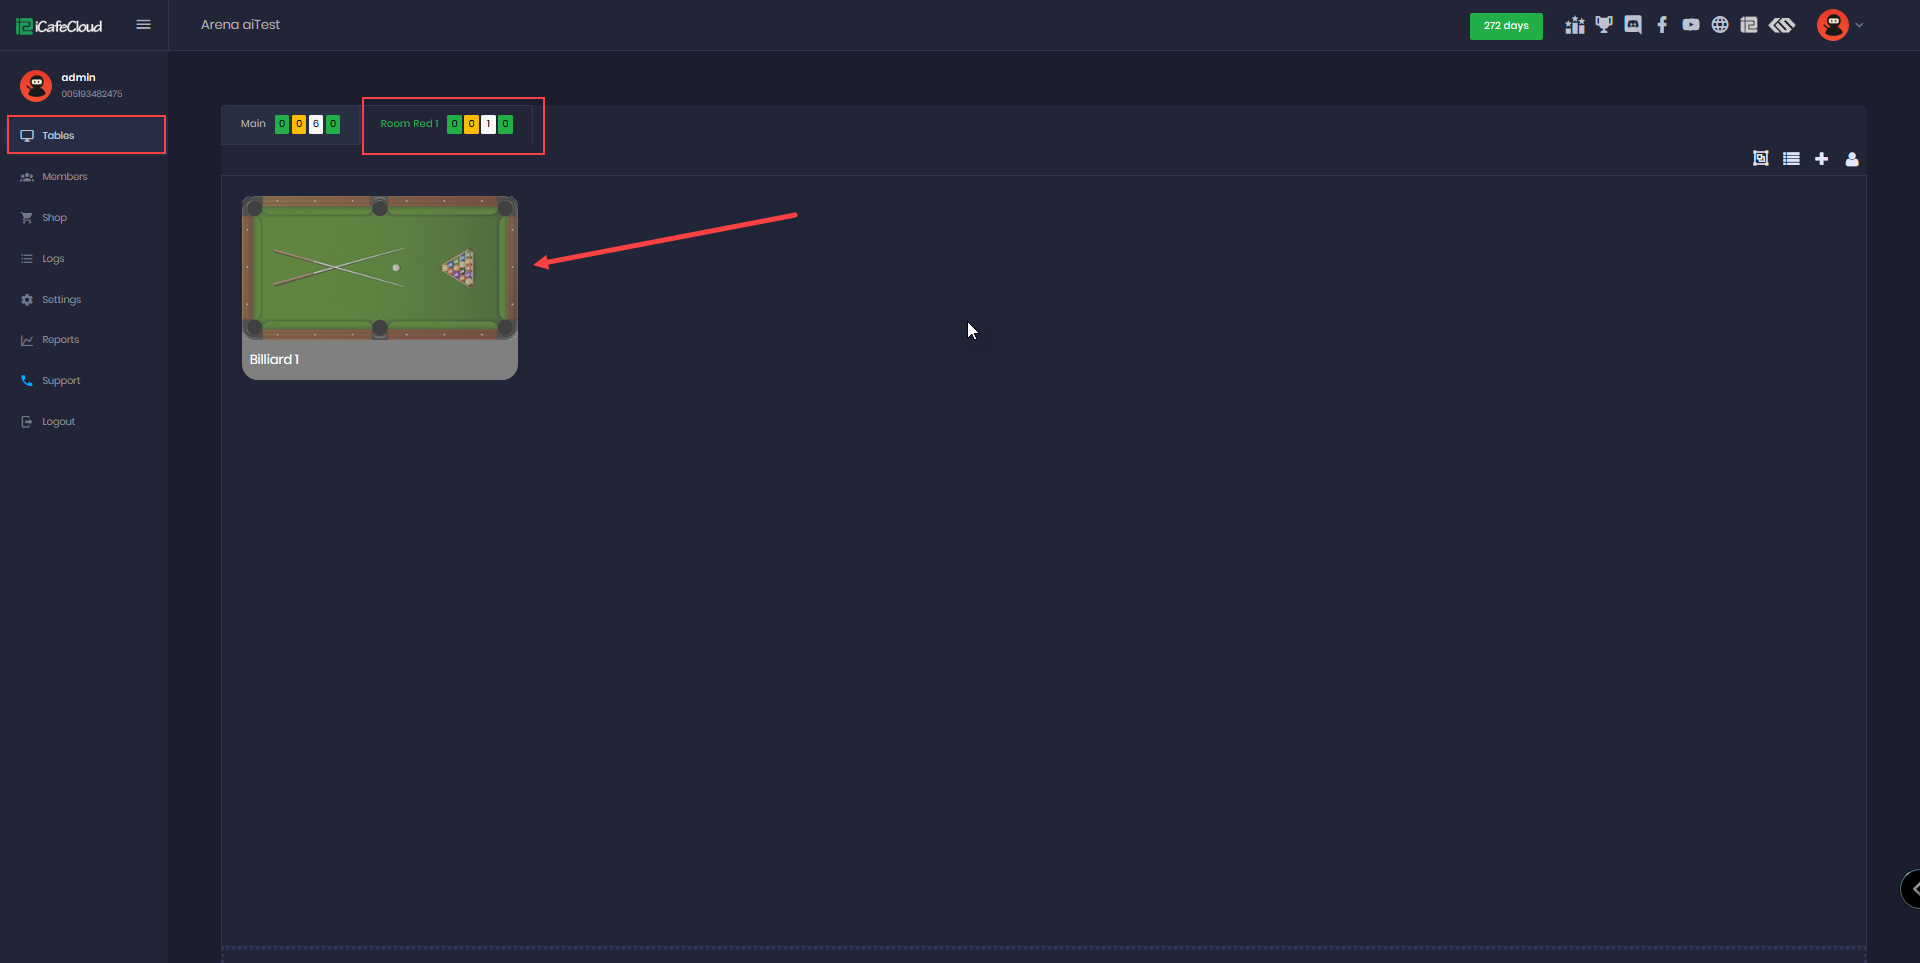
- Once the table is created, it will appear in the room you selected.(Figure 7)
Figure 7
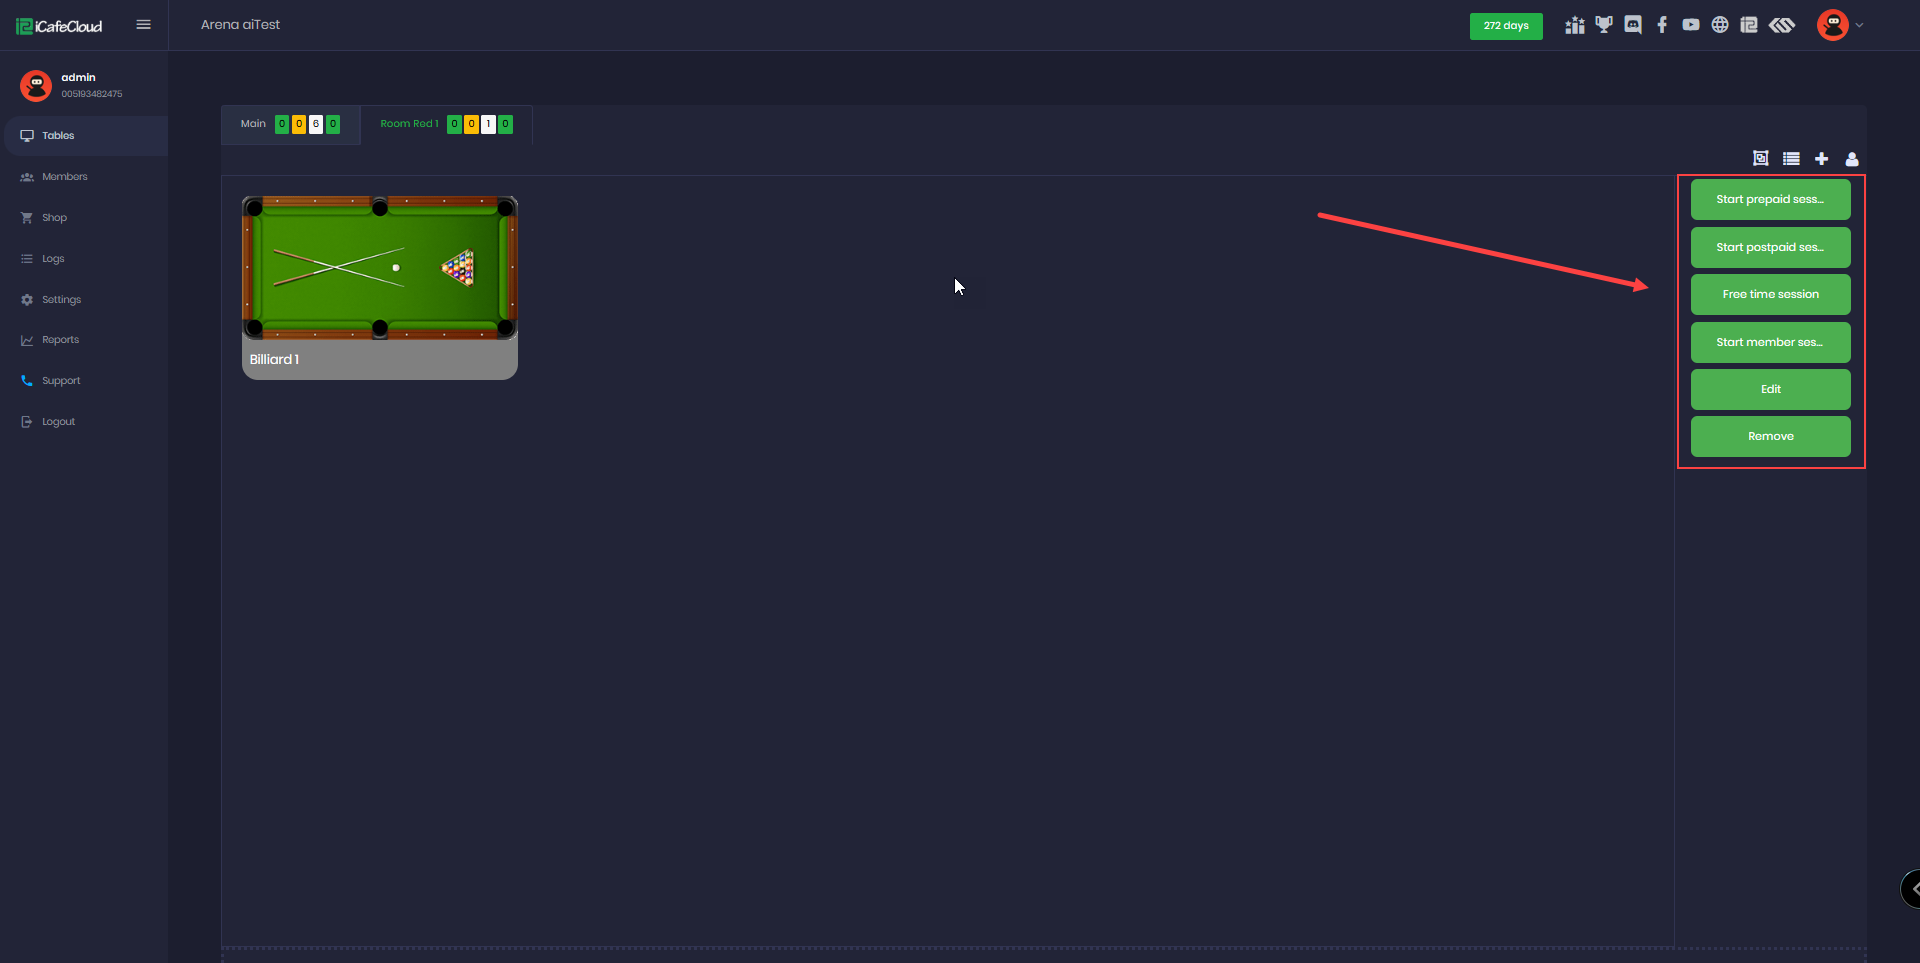
- Click on Billiard 1, and a list of options will appear on the right side. (Figure 8)
Figure 8

